Build Proposal - Ratings
Here's how to work with ratings on your proposal (RFP response) in Bionic for Ad Sales.
The Ratings section of your proposal enables you to communicate market, ratings, reach, frequency, and other useful information to the media buyer.
Table of Contents
- Go to Ratings Section
- Choose Market
- Select Gender
- Specify Age Range
- Enter Population
- Enter Rating
- Review Average Persons
- Enter Number of Spots
- Review GRPs
- Review Cost Per Point
- Review Estimated Impressions
- Review Net CPM
- Review Reach Count
- Review Reach Percentage
- Review Frequency
Go to the Ratings Section
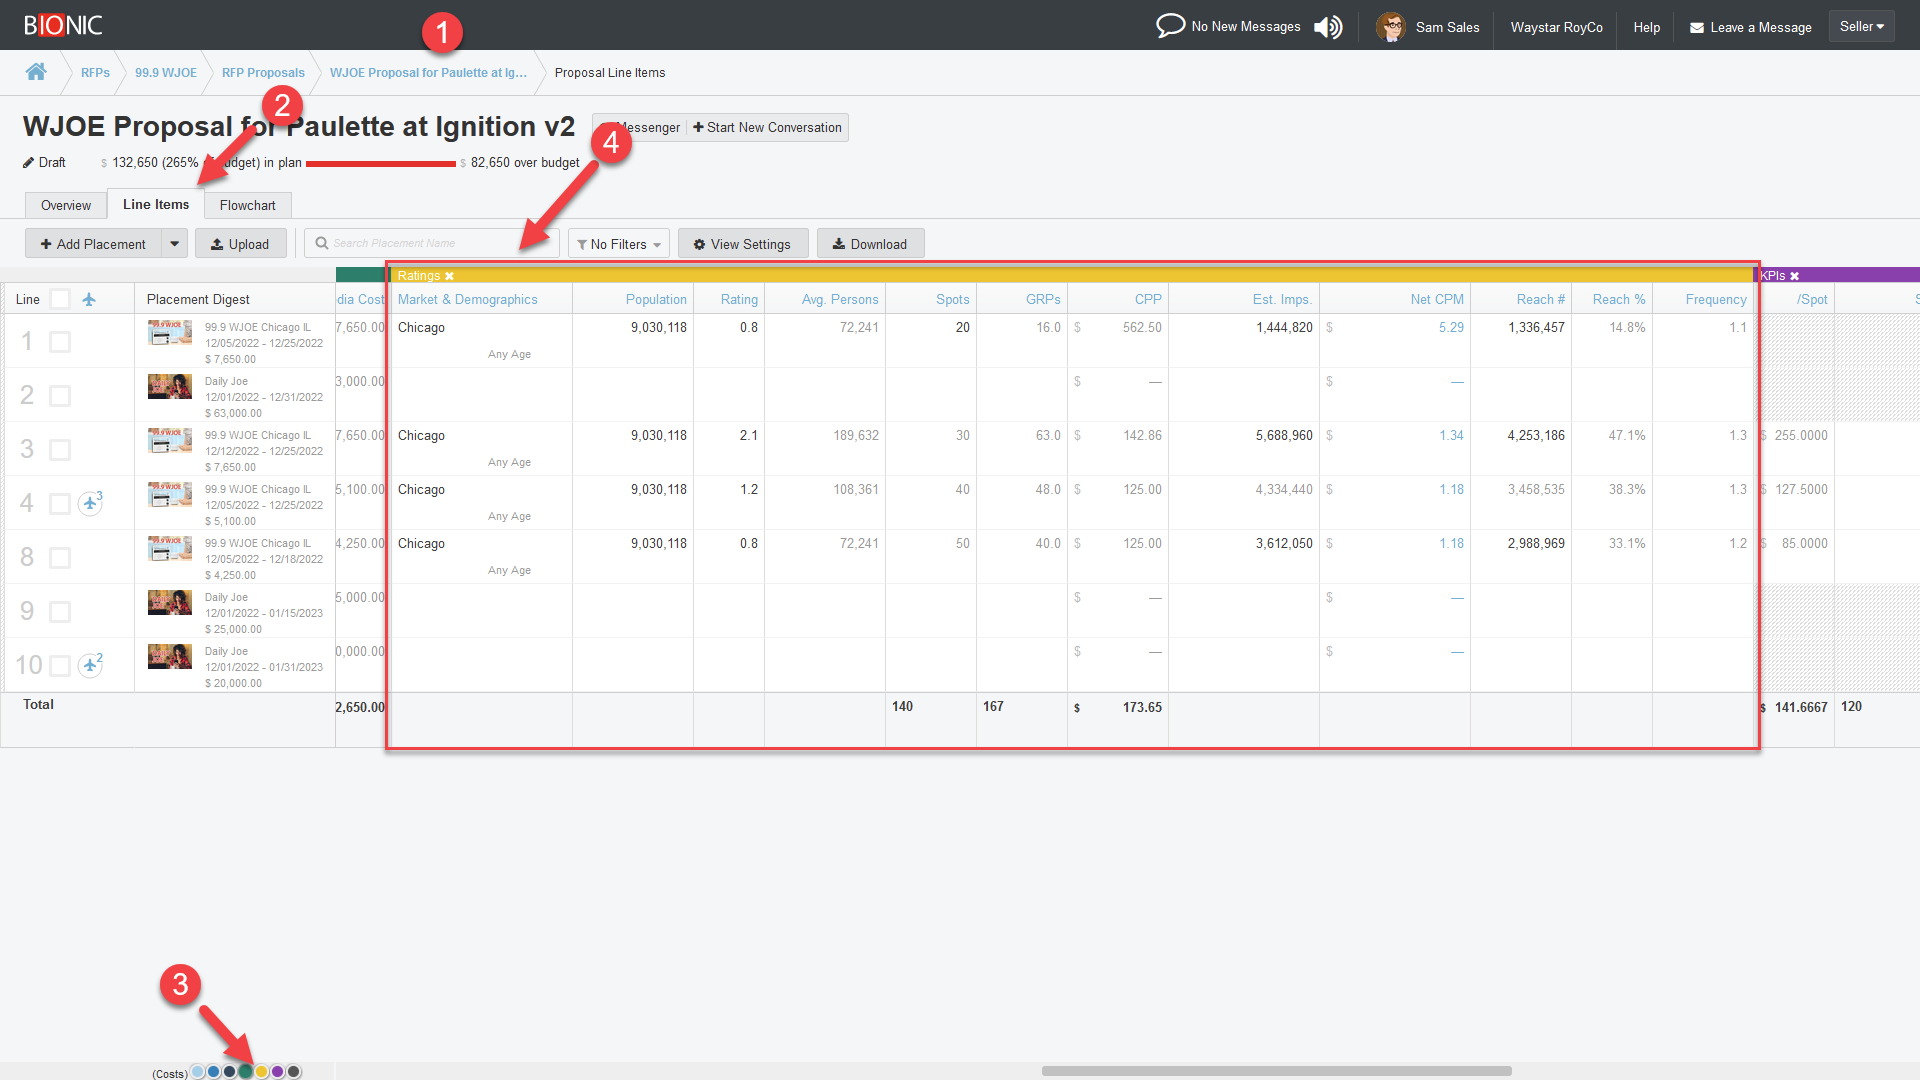
To get to the Ratings section of your proposal:
- View Your RFP.
- Click on the Line Items tab.
- Scroll right or click the gold button in the Teleport Tool.
- See the "Ratings" section. Can't Find Ratings Section?
Note: If you upload an XML file, the Ratings section will automatically populate.
Can't Find Ratings Section?
If you don't see the ratings section on your proposal line items, it may be because:
- The media buyer did not include Ratings in their RFP.
- The ratings section is hidden.
Ratings Not Included in RFP
Unless the media buyer specifically requested ratings in their RFP, you will not see the ratings section.
Ratings Section is Hidden
By default, you will see the ratings section if it was included in the RFP. However, somebody (we're not gonna name names here) may have hidden it.
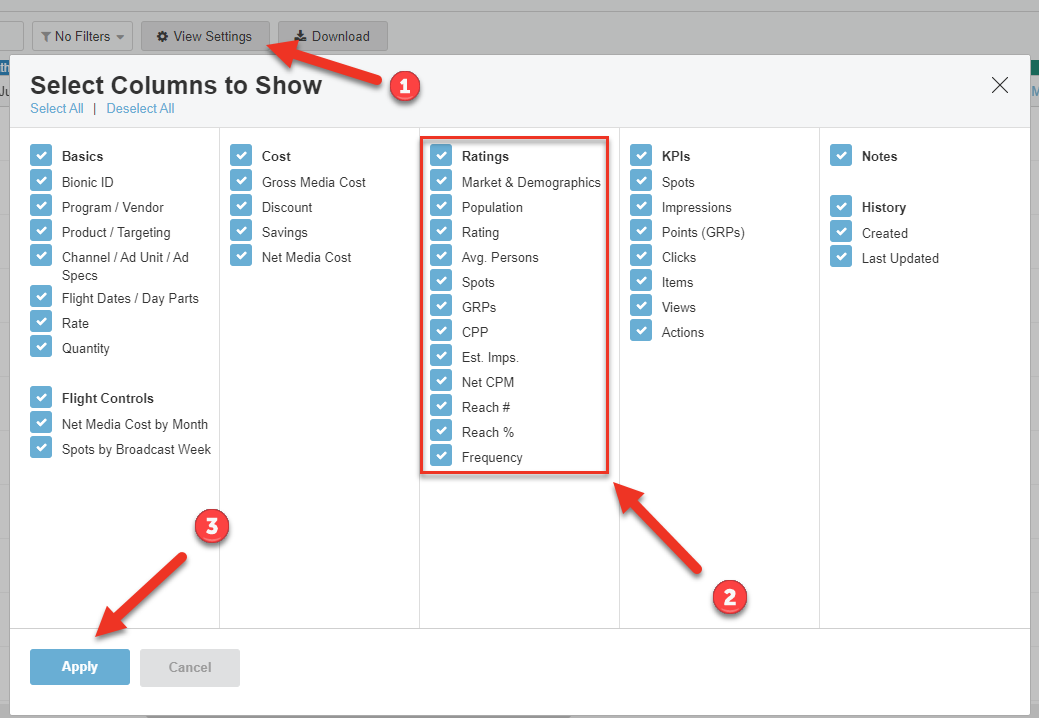
Here's how to unhide the ratings section:
- Click the View Settings button.
- Select the fields in the ratings section.
- Click Apply.
Choose Market
Tip: After you Choose a Product, the Market will fill with the default value for that product. If nothing pre-fills, you should update your products with Market information to streamline your proposals.
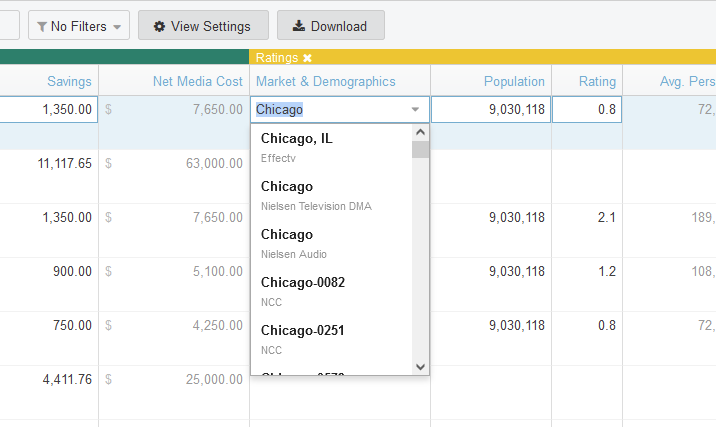
To choose your market:
- Tab or Click into the Market field in the "Market & Demographics" column.
- Start typing the name of your market.
- As you type, the list of markets will narrow to match your search.
- Select the your market.
Note: Your market may appear multiple times in the list. That's because Bionic supports multiple ratings providers. Each has their own way of defining market boundaries. See the ratings service label below the market name to choose the correct market.
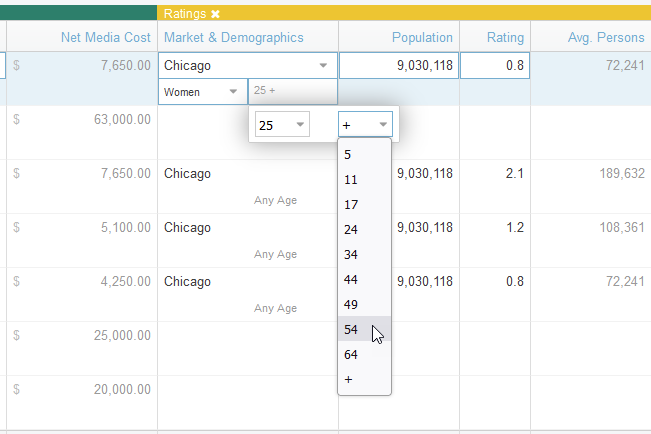
Select Gender
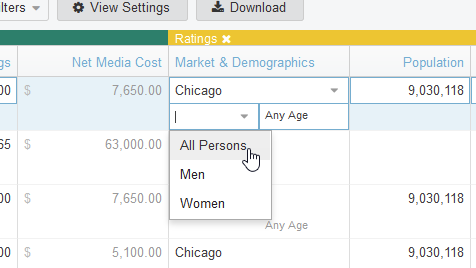
To specify a gender:
- Tab or Click into the Gender field in the "Market & Demographics" column.
- Choose gender from the list that drops down.
Tip: Set Gender to "All Persons" unless you want to target a specific demographic in your population count.
Note: The choices for gender are limited by the ratings service associated in the market.
Specify Age Range
To specify an age range:
- Tab or Click into the Age Range field in the "Market & Demographics" column.
- Choose age range from the list that drops down.
Tip: Set Age Range to "Any" unless you want to target a specific demographic in your population count.
Note: The choices for age ranges are limited by the ratings service associated in the market.
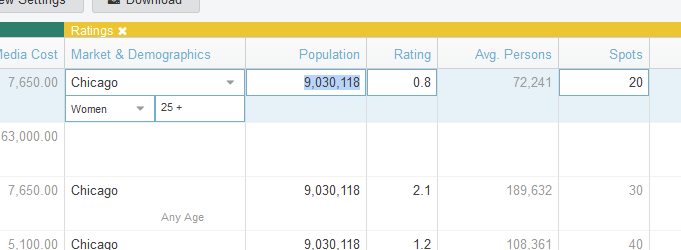
Enter Population
Tip: After you Choose a Product, the Population will fill with the default value for that product. If nothing pre-fills, you should update your products with Population information to streamline your proposals.
To enter your population:
- Tab or Click into the Population field.
- Enter the size of the population.
Note: Use your ratings service or in-house research to determine the population.
Enter Rating
Tip: After you Choose a Product, the Rating will fill with the default value for that product. If nothing pre-fills, you should update your products with Rating information to streamline your proposals.
To enter your rating:
- Tab or Click into the Rating field.
- Enter the rating.
Note: Use your ratings service or in-house research to determine the ratings.
Review Average Persons
Bionic will automatically calculate Average Persons based on the population and rating.
To review your average persons:
- Hover your mouse over the Avg. Persons field.
- See the tooltip that explains the calculation.
Enter Number of Spots
Tip: Your number of spots will default to the number of spots you specified in Quantity if your cost method of your Rate is "Per Spot."
To enter your number of spots:
- Tab or Click into the Spots field.
- Enter the number of spots.
Review GRPs
Bionic will automatically calculate Gross Ratings Points (GRPs) based on the number of spots and rating.
To review your Gross Ratings Points calculation:
- Hover your mouse over the GRPs field.
- See the tooltip that explains the calculation.
Review Cost Per Point
Bionic will automatically calculate Cost Per Point (CPP) based on the Gross Media Cost and Gross Ratings Points.
To review your Cost Per Point calculation:
- Hover your mouse over the CPP field.
- See the tooltip that explains the calculation.
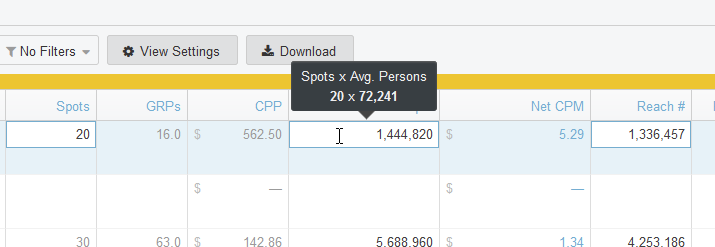
Review Estimated Impressions
Bionic will automatically calculate Estimated Impressions based on the Average Persons and Number of Spots.
To review or modify your Estimated Impressions:
- Hover your mouse over the Est. Imps. field.
- See the tooltip that explains the calculation.
- Modify the value if necessary (this is rare).
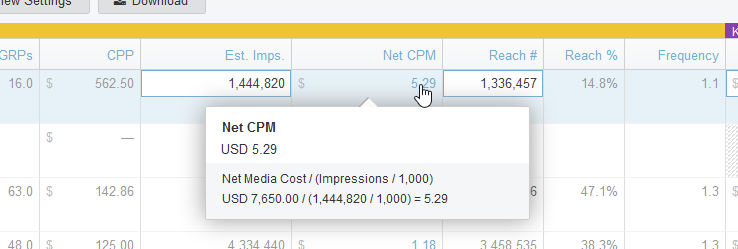
Review Net CPM
Bionic will automatically calculate Net Cost Per Thousand Impressions (Net CPM) based on Net Media Cost and and Estimated Impressions.
To review your Cost Per Point calculation:
- Click the value in the Net CPM field.
- Review the calculations.
Review Reach Count
Bionic will automatically calculate the number of people you will reach using an algorithm.
To modify your Reach Count:
- Tab or click into the Reach # field.
- Enter the value.
Note: Use your ratings service, platform data, or in-house research to estimate the number of people you will reach.
Review Reach Percentage
Bionic will automatically calculate the percentage of the population you will reach based on the Reach Count and Population.
To review your Reach Percentage:
- Hover your mouse over the Reach % field.
- See the tooltip that explains the calculation.
Review Frequency
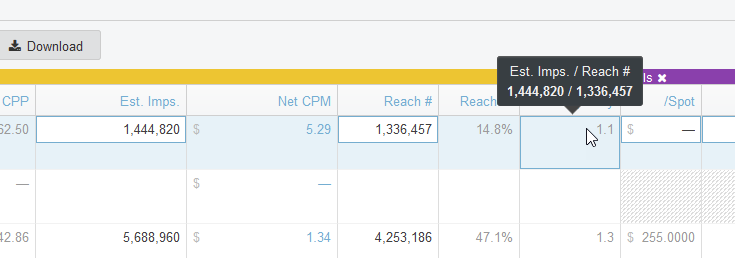
Bionic will automatically calculate the frequency based on the Estimated Impressions and Reach Count.
To review your Frequency calculation:
- Hover your mouse over the Frequency field.
- See the tooltip that explains the calculation.
