![Bionic-Logo-184x60-white.png]](https://help.bionic-ads.com/hs-fs/hubfs/Bionic-Logo-184x60-white.png?height=40&name=Bionic-Logo-184x60-white.png)
Schedules in Bionic for Advertisers provide you the flexibility to look a variety of different data points across a specified time frame in a calendar view of your choice.
In this article, we'll cover:
- Filter Campaigns
- Choose Specific Time Frame
- Choose Calendar Preference
- View Specific KPI
- Convert Currency
- Download Schedules
Filter Campaigns
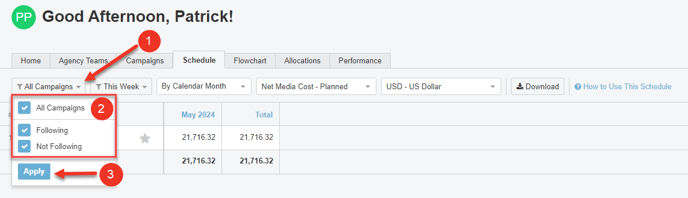
Use the Follow feature to filter the campaigns displayed based on your preference. Here's how to filter based on your Follow selection:
TIP: Learn how to follow campaigns here: Follow Campaigns.
NOTE: This filter is available at the Organization and Agency Team levels.
- In the Schedule Tab, click on the All Campaigns filter.
- Choose whether to filter based on Following or Not Following.
- Press Apply.
Choose Specific Time Frame
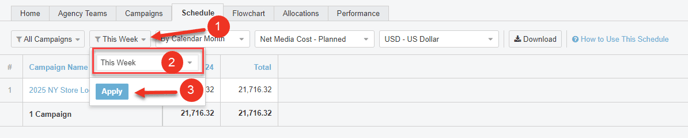
The Time Frame option enables you to identify the dates you want to work within. There are a number of predefined options such as Next 7 Days or This Year, or you can use the Custom option to define your own dates.
- Click on the Time Frame filter.
- Choose your desired time frame.
- Press Apply.
Choose Calendar Preference
Your calendar preferences enables you to choose how to breakout and present your data. You can choose between Totals, Daily breakouts, or by a variety of standard or broadcast calendar breakouts.
- Click on the Calendar Preference dropdown.
- Select your calendar preference.
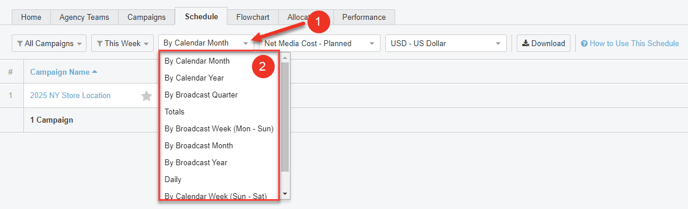
Tip: Use Calendar Preference in conjunction with the Time Frame option for best results. For example, when viewing data for This Week, a Daily breakout works well. When viewing data across a full year, a Weekly or Monthly breakout is more appropriate.
View Specific KPI
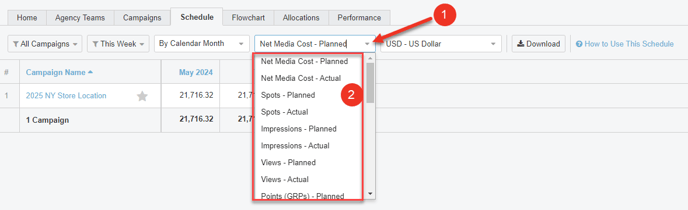
While your planned Net Media Cost (the default) is often a good data point, there are numerous other metrics that could be helpful. You can opt to view any of the available KPIs - either Planned or Actual.
- Click on the KPI dropdown.
- Select a KPI.
Convert Currency
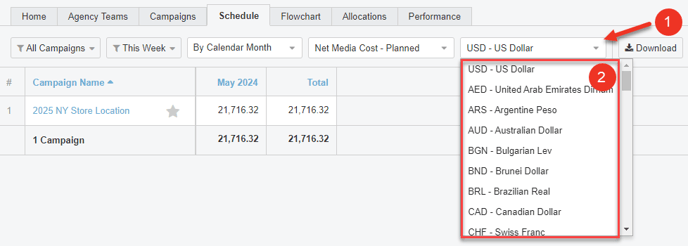
Convert your data to a specific currency. The Currency option is only available when presenting financial data. Currency conversions use the exchange rates configured in your Bionic account settings.
- Click on the Currency dropdown.
- Select Currency.
Download Schedules
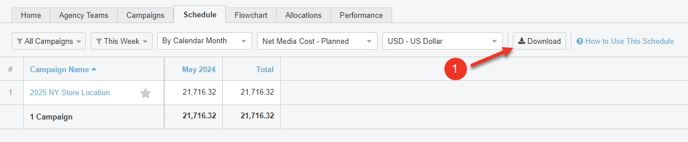
An Excel (.xlsx) file of your schedule is available to download at any time. The downloaded file includes all data visible in your current Schedule view, reflecting any active filters and time frame selections.
- Press the Download button.