Learn in Bionic Academy: Manage Media Plans
Flighting enables you to break out a placement based on time periods that need to be tracked individually. Flights may have varying costs and quantities associated with each time period.
This article will discuss general flighting. There are also specific functions built in to support:
Flighting Broadcast Placements
In this article, we'll cover:
- Flight a Placement
- Add Additional Flights
- Collapse/Expand Flights
- Delete Flights
- Flight a Package
- Unlink Package Flights
Flight a Placement
Here is how to flight a placement in a media plan:
CAUTION: In order to use flighting, you must first setup the placement.
TIP: It is often most efficient to complete the details of the placement before enabling flighting. Data entered will automatically pass down through each of the flights so you only need to change differences within individual flights.
- For the Placement you wish to flight, Click on the Action Items menu.
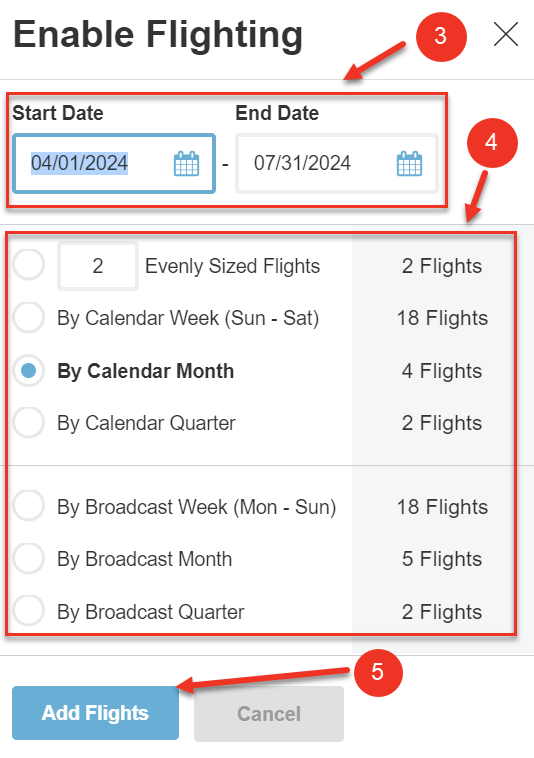
- Select Enable Flighting.
- Enter the Start Date and End Date of the flight. (These dates will automatically populate if you already entered them in the placement.)
- Select how you would like the flights to be broken out based on the policies available.
- Click Add Flights.
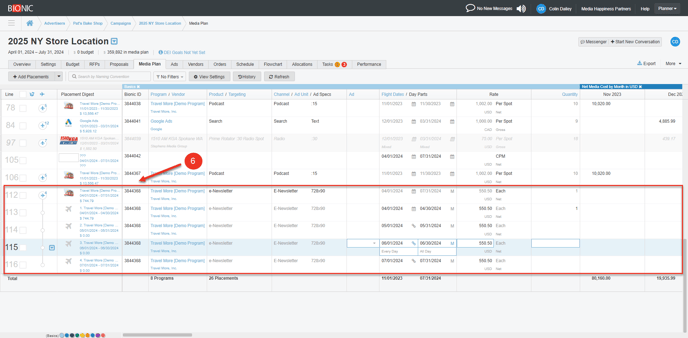
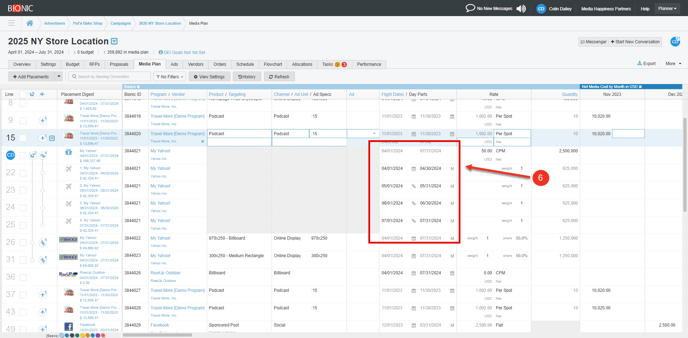
- Find your new Flighted Placement.
Once completed, the placement header will contain the core placement details. There will be line items for each flight breakout that will enable to you modify variances for each flight, such as cost, quantity, KPIs, etc.
You can also adjust any Start Date and End Date for a given flight to support blackout periods.

Add Additional Flights
Here's how to add additional flight members:
- Open the Action Items Menu on the Flight Header.
- Press the Add More Flights button.
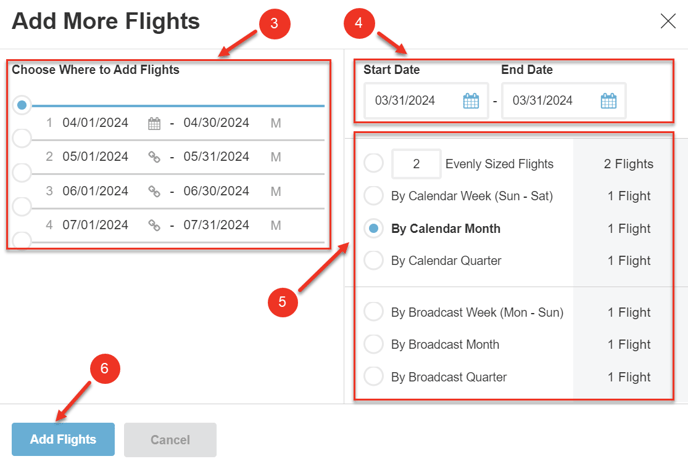
- Choose Where to Add Flights using the Radio button.
- Enter the Start Date and End Date of the new flight(s).
- Select how you would like the flights to be broken out based on the policies available.
- Click Add Flights.
NOTE: Bionic will automatically generate the flights and populate flight dates based on the policy selected. You may make any adjustments to individual dates as necessary, and the flights will automatically adjust based on the following policy:
- Start Date for 1st flight will always be a specific date
- The Start Date for subsequent flights will be right after previous flight by default. You can modify this policy for individual flights after the flights have been created. Click in the Start Date field and select the policy you need.
Rates and quantities can be modified for each flight by changing those attributes on that specific flight member.

Collapse/Expand Flights
To condense your media plan you can collapse flights. This will take all lines you have dedicated to a flight and collapse them into just one row, the placement header. Once collapsed, you can expand the flight to display all lines again. Here's how:
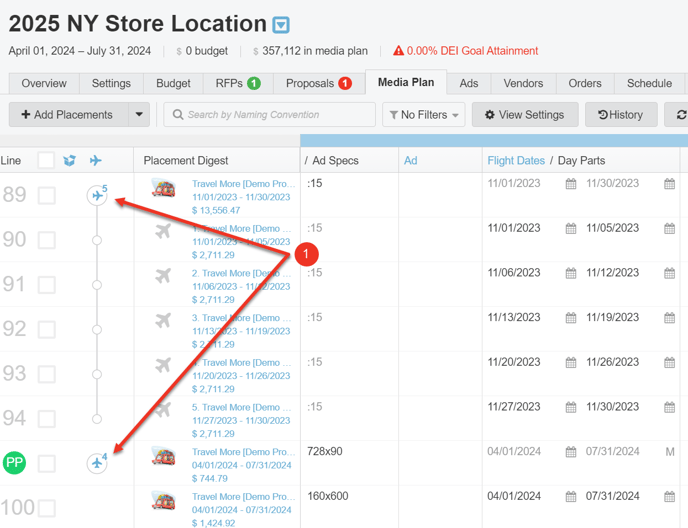
- Click on the Flight Icon to collapse (or expand) flights.
NOTE: Once collapsed only the flight header will appear. The flight icon will now show a vertical airplane with the number of flights for that placement.
Delete Flights
You may delete individual flights or multiple flights simultaneously in a media plan. Here's how:
- Delete Individual Flights
- Bulk Delete Flights
Delete Individual Flights
- Click on the Action Items Menu next to the flight you want to remove.
- Select Delete This Flight to remove this flight.
NOTE: Prior or subsequent flights dependent upon this flight will automatically update to reflect the change.

Bulk Delete Flights
- Check off the boxes of the flight(s) you wish to delete.
- Press the Delete button.
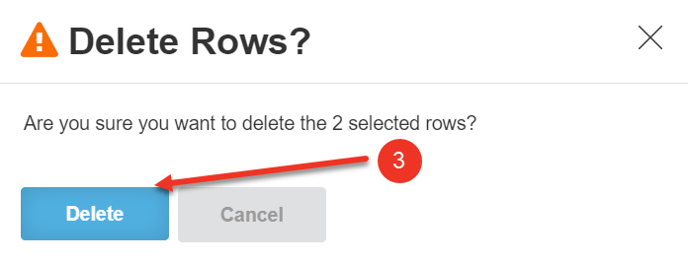
- Click the Delete button in the confirmation popup.
NOTE: If you delete ALL flights for a placement, the placement will also be deleted. At least ONE flight must be left to keep the placement.

Flight a Package
When you flight at the package level, each placement within the package will be flighted exactly the same. You will control the flighting within the package header. This is helpful when all placements in a package will share the same flight variances.
Here's how to Flight a Package:
CAUTION: You must first set up a package. Learn more on creating packages here: Build Out Packages and Roadblocks.
- Click the Action Items Menu of the package header.
- Select Flight at Package Level.
- Enter the Start/End Dates.
- Select the date policy of the flights.
- Press Add Flights.
- Find the newly created Flighted Package.
NOTE: The flights will be applied to each of the placements in the package and must be controlled from the package header.
To add another flight to each placement within the package, follow the same steps found in the Adding Additional Flights section of this article. Adding a flight to one placement will update all placement in the package.


Unlink Package Flights
Once you have set up flighting at the package level, you can unlink flights from the package if needed. Here's how:
- Click the Action Item Menu of the package header.
- Select Unlink Flights from Package.
- You will now see a Package with individually flighted placements.

