Learn in Bionic Academy: Automate Reporting
Bionic has a full integration with Looker Studio which provides you with a virtually unlimited scope of reporting options and presentations directly from your Bionic data.
With this integration, you can connect to your Advertiser data and have the power of Looker Studio to generate dashboards, report presentations, and even custom calculated fields.
In this article, we'll cover:
- Create a Data Source
- Configure the Bionic Connector
- Create Report in Looker Studio
- Switch Between Data Sources
Create a Data Source
Note: If you previous connected to Bionic in Looker Studio using the old Community Connector and no longer see your data, create a new data source using the steps below to reconnect through the official Bionic Partner Connector.
Looker Studio works at the Advertiser level. You can create a data source connection for each Advertiser or choose to select All Advertisers you want to report data on. Here's how to create a Data Source in Looker Studio:
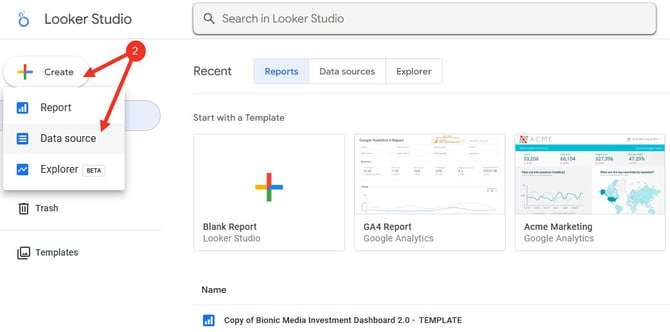
- Log in to Looker Studio.
- In the left navigation, click Create > Data Source.
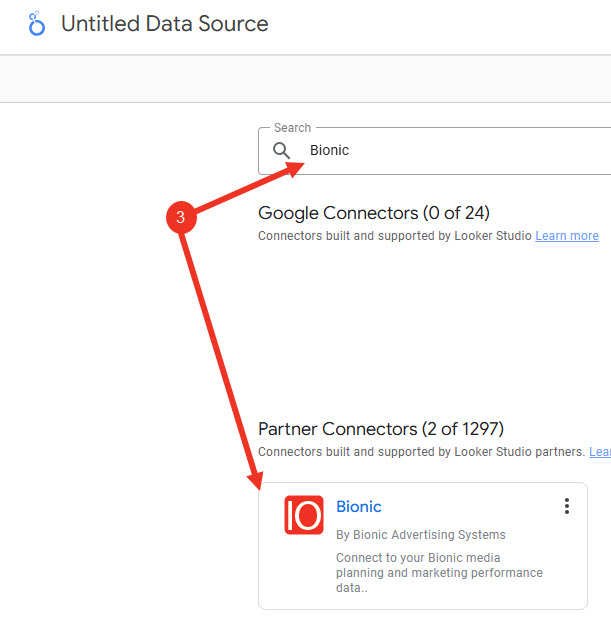
- In the list of connectors, search for Bionic and select the Bionic Partner Connector.
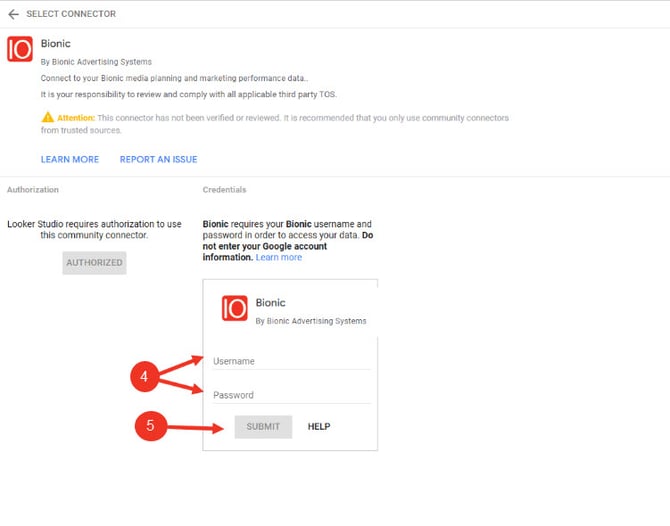
- Enter Your Bionic login credentials when prompted.
- Press Submit to create the connection.

Configure the Bionic Connector
Once the data source has been authorized and credentials submitted, you will need to set a couple of basic options to configure the connector:
- Name Your Data Source - If the data source is specific to the Advertiser, it's recommended to rename the data source to reflect that Advertiser.
- Advertiser - When selecting an Advertiser, you will be presented with the full hierarchy of Advertisers. You can opt to select just an individual Advertiser. This will give you data for just this Advertiser. Or, for any of the Parent Advertisers there will be an option (with sub-advertisers). Selecting one of these will pull all of the data under that Advertiser and all Sub-advertisers.
- Currency - By default, monetary data will use the Advertiser's default. You can leave this option blank if the Advertiser's default currency is appropriate. If you need to change the currency, choose the appropriate currency from the drop down menu.
- Other Actions - Log Off Bionic is currently the only option available in this list. While you do not need to log out of Bionic under normal circumstances, this option is available in case you need Looker Studio to log out. Do NOT select this action when initially creating a new Data Source.
- Use Report Template - When selected (it is by default), a report template will be used to display a dashboard of your data. You can use this template as a base to start from, or opt to build a report from scratch.
- Once options have been configured, click Connect.

Create Report in Looker Studio
Once you have set up a Bionic Connector in Looker Studio, it will immediately display the list of fields available for you to use. Here's how to create a report in Looker Studio:
- Click on Create Report.
- When prompted, confirm by clicking Create Report.
-
You can use the controls provided in Bionic to change layout, theme, filters, charts, etc.
NOTE: If you opted have a report template, it will automatically display a dashboard with commonly requested data.


TIP: Google provides a help link in the upper right corner documenting use of Looker Studio. You can also contact Bionic Customer Support (support@bionic-ads.com or (603) 676-7285 Option 3) for assistance with setting up your particular reporting requirements.
Switch Between Data Sources
If you have set up Bionic connectors for multiple Advertisers, you will need to choose which Data Source to use for reporting when you go into Looker Studio. Here's how to switch between data sources:
- On the Looker Studio home page, Select the Data Sources tab.
- Click on the Data Source Name.
