Each member of the ad sales team that will be accessing RFPs, managing program content, or are contacts on programs will need access to log into Bionic for Ad Sales. While this access can be provided by Bionic Customer Support, it can also be set up by Administrator users with your company.
Note: This feature is only available to administrators. Bionic Customer Support can grant Administrator access to applicable staff upon request.
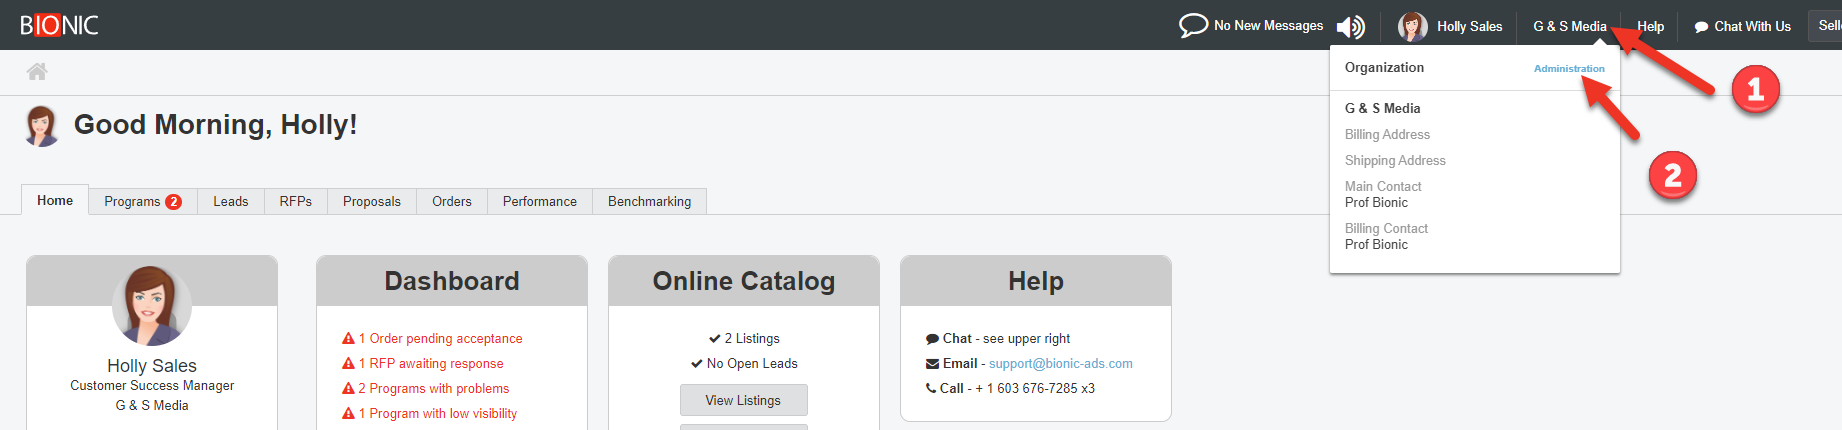
Access the User Administration
- Click on your company name
- Click on the Administration link
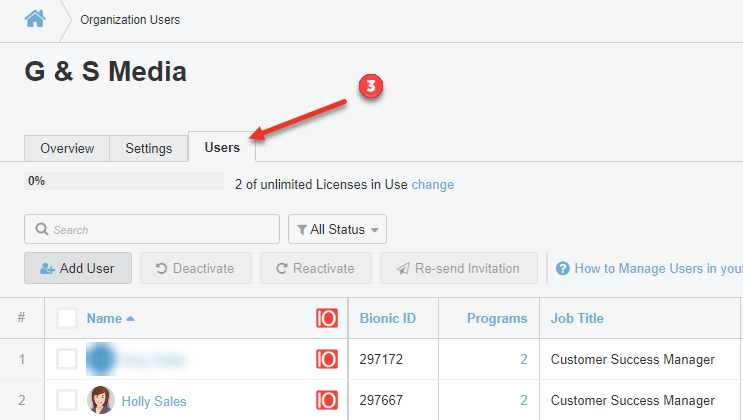
- Click on the Users tab.
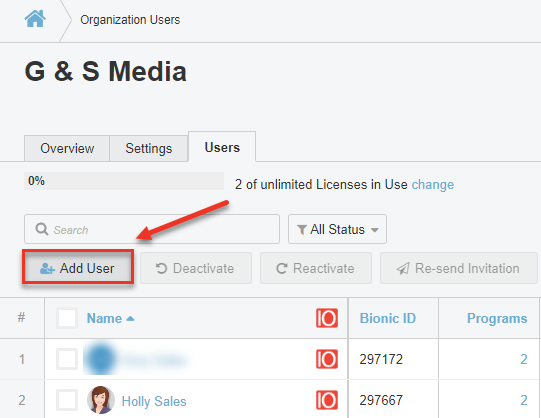
Add a User
If a person from your company needs access to Bionic, you can add them.
To add a new user, press the Add User button at the top of the user list
Enter a Email Address
- Enter the user's email address
- Click Add User
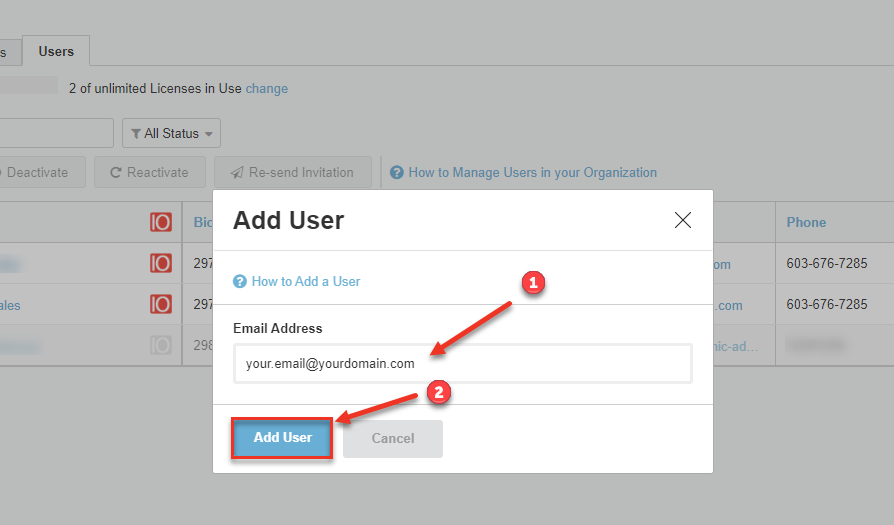
NOTE: Email address must be the same domain as your organization. If this differs, please contact Bionic Customer Support.
Enter User Contact Information
- Enter information for user
- Click Add User

Notify a User
The user will receive an email providing them with an activation code and a link to activate their account. Once activated they'll be able to access Bionic for Ad Sales.
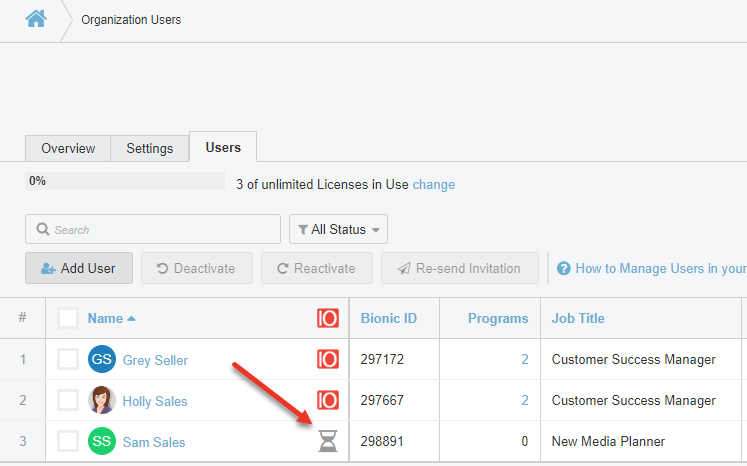
The user will be "Pending" until they activate their account. This pending status will display as an hourglass icon:
Re-send the Invitation
If the user accidentally deletes or misplaces the email containing the link to activate their account and their activation code you can resend the invite.
- Select the checkbox next to the user's name
- Press Re-send Invitation
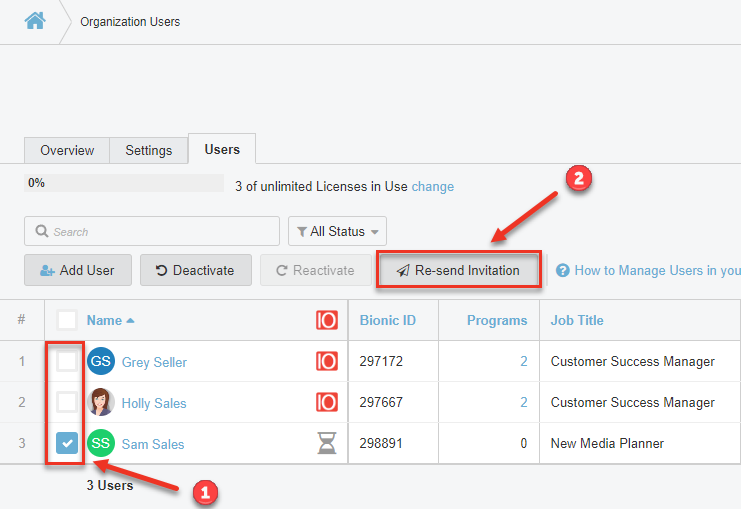
Another email will be sent to the email address associated with the pending user.
Deactivate Users
If a Bionic user has left the company or no longer needs access to the platform you can deactivate them.
- Select the checkbox next to the user's name
- Press Deactivate

Once deactivated, the user will no longer be able to access Bionic for Ad Sales.
Reactivate Users
If an inactive user needs access to Bionic again you can reactivate them.
- Select the checkbox next to the user's name
- Press Reactivate
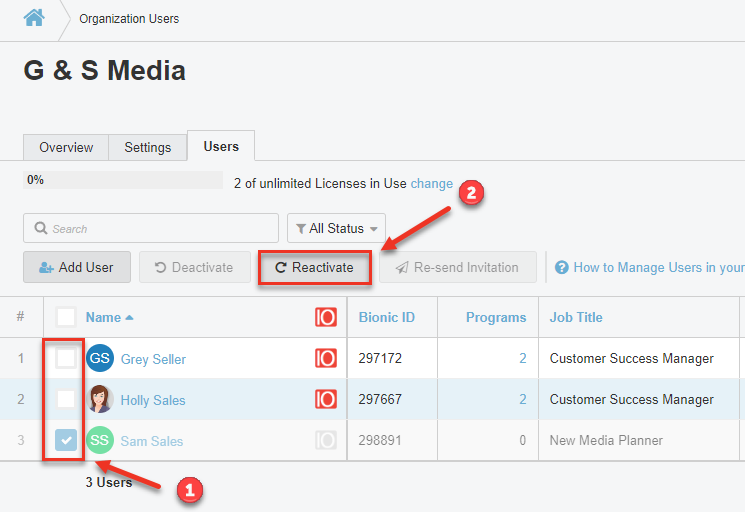
Once reactivated, the user will be able to log into Bionic for Ad Sales using their original username and password.