Learn in Bionic Academy: Build Plans With RFPs
RFPs can be created at any time during your campaign process. It can be your first step after setting up a new campaign, or even after you have started building your media plan.
When setting up RFPs, you will need to create a separate RFP for each sales team you are reaching out to. Each RFP will be assigned to specific recipients, and will contain the RFP requirements and resulting proposals sent back from the vendor sales team.
In this article, we'll cover:
Create an RFP
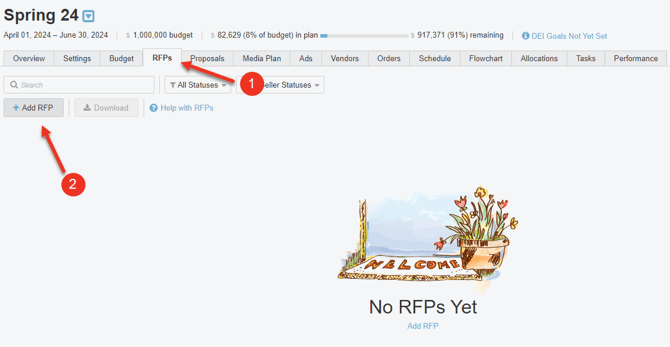
Here's how to create a new RFP:
- In the campaign you want to create an RFP for, click on the RFPs tab.
- Press Add RFP button.
- Name the RFP.
- Press Add RFP.

Build RFP Details
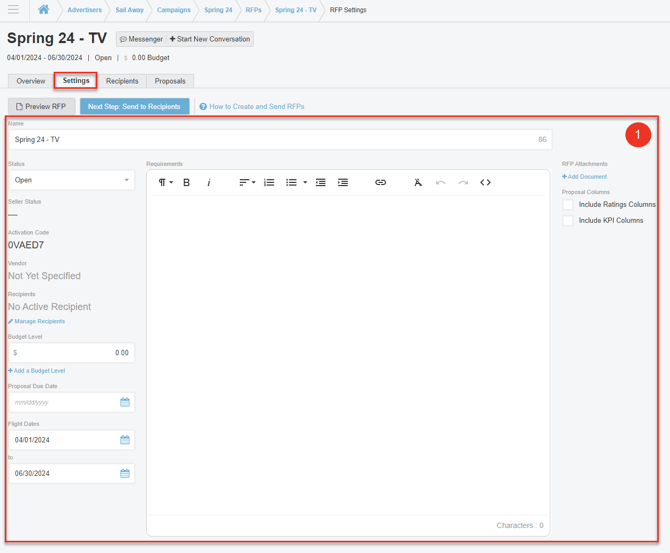
Once you have created your RFP you will need to add the RFP details. Here's how to update those details:
- Add/Update the necessary fields in the Settings Tab of an RFP.
Here is an explanation of the fields you'll encounter in the Settings Tab:
- Name - This will carry in from the name you entered when first creating the RFP. You can change this name as needed.
- Status - Default = Open. Each RFP can be either Open or Closed. When an RFP is Closed, Vendors cannot submit proposals to that RFP.
- Seller Status - Reflects the status of proposals from vendor for this RFP. There is no status set until you have submitted the RFP.
- Activation Code - Salespeople who are set up as users of Bionic Seller can use this code to access this RFP even if they are not in the recipient list. Intended for those emergency situations where an invitee is unavailable and needs someone else to access the RFP. This code will be included in the invitation sent to those in the recipients' list.
- Vendor - Represents Vendor(s) this RFP will be sent to based on recipients specified in the Recipients tab of the RFP.
- Recipients - Lists out any Recipients that have been specified in the Recipient tab. You can click the Manage Recipients link to quickly jump to that tab.
- Budget Levels - Enter a budget for the RFP. Press the Add a Budget Level link to add additional budgets as needed.
- Proposal Due Date - Identify the date that proposals are due.
- Flight Dates - Automatically populates based on campaign flight dates. Can be modified as needed for this RFP.
- Requirements - Enter or copy/paste detailed requirements for this RFP.
- RFP Attachments - Press Add Document to upload 1 or more supplementary documents. These will be accessibly to the Vendor. 25 MB max size.
- Proposal Columns - Select whether you want make Ratings Columns or KPI Columns (that you have added to the Media Plan) available to the vendor when they complete their proposal(s).
Bionic auto saves RFPs after each entry. No need to manually save anything!