Generate Insertion Orders
Here's how to Generate Insertion Orders in Bionic for Agencies.
Learn in Bionic Academy: Manage Orders
Insertion orders can be generated directly from the orders you create. Insertion orders can be can be electronically transmitted to the vendors (or downloaded and handled offline). You can also handle instances where insertion orders may be sent to you by the vendors.
NOTE: If orders do not require an insertion order, you can skip these steps.
In this article, we'll cover how to:
- Send Electronic Insertion Orders
- Add an IO Recipient
- Remove an IO Recipient
- Generate Offline Insertions Orders (or Accept Vendor Generated Insertion Orders)
Send Electronic Insertion Orders
In Bionic, you can conveniently send insertion orders electronically, to allow the vendor to electronically sign the IO directly within Bionic. Here is how to send electronic insertion orders:
- From the Orders tab, click on the Order number to open the order details.
- In the Overview tab, click the Request Online Acceptance button.
- Select the checkbox next to the name(s) you would like to send the order to. Use the search if needed to find your contact.
- Press Send.
NOTE: If a recipient's name you wish to send the IO to is not in the contacts list, you may have to add a new recipient. Please refer to Add an IO Recipient.


NOTE: You will be notified via email once the vendor responds. They can opt to Accept or Reject the order.
Add an IO Recipient
In order to send an IO to a recipient, they first must be added as a verified contact to the Vendor.
Here's how to add a recipient to an IO and send the IO to them:
- Go to the Order details of the IO you'd like to send out by clicking on the Order Number.
- Click on the Recipients tab of the Order.
- Click the +Add Recipient button.
-
There are 2 ways to add/select Recipients:
-
+Add Tab
If you have a recipient's email address, you can enter a specific email address. Upon adding Recipients based on email, Bionic will lookup the email address to find a match. If no exact match is found but an email domain match has been, that contact will automatically be added as a contact for this Vendor.
-
Lookup Tab
Use the Lookup to find a specific Vendor contact based by program in the Bionic directory by typing in a program name.
Once you choose the program from the list, Bionic will display the contacts listed on the data card.
-
- Add recipient and/or Send IO:
-
To add recipient but not send the IO to them, click the Add Recipient button. This will simply add the recipient, but not send the IO. This is useful if you want to get recipients set up, but are not ready to send out the IO yet.
-
Click the Add & Send button if you want to add the recipient and immediately send them the IO.
-
- Send (or resend) an IO:
- In the Recipients table, select a recipient using the checkbox next to their name.
- Click the Send button to send (or resend) an IO.
CAUTION: If the recipient you are adding does not have a verified email domain for this Vendor, you will have to reach out to Bionic Customer Support to add this recipient. This is done to ensure only users with verified email domains for the Vendor receive the IO.
NOTE: You can only Send an order to a recipient once it has been Approved.


Remove an IO Recipient
You may encounter situations where you need to remove a recipient from the list. This action will prevent that person from accessing the IO.
Here is how to remove a recipient:
- Click on the checkbox next to the recipient(s) name you want to deactivate.
- Click the Remove button.

Generate Offline Insertions Orders (or Accept Vendor Generated Insertion Orders)
Any form of offline insertion order can be managed through this workflow:
- From the Orders tab, click on the Order number to enter into edit mode.
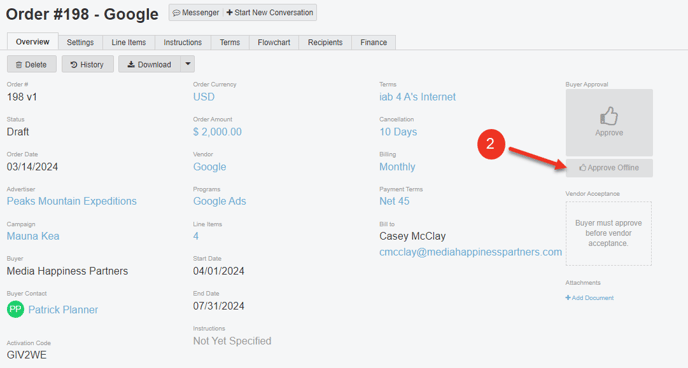
- In the Overview tab, click the Accept Offline button.
- If you need to generate an insertion order, click on the Download the order PDF link. This will generate a PDF with the approver's signature if one is present from the approval. Follow the instructions to get the vendor signature.
- To record the acceptance, in the Order Approved By box, enter the name of the vendor approver.
- Attached the signed document (optional).
- Press Approve.


