Bionic enables you to set custom fields for entered Payments. These columns can represent additional data, text, picklist and numbers that you need for each payment. This is often used to map data with external systems, such as a financial platform.
To set custom fields on the Payments level, you first must create a custom field.
Once you have created custom field(s) with Payments as the Object Type, you’ll then be able to utilize your payments custom fields.
Here, we’ll cover how to:
View Payments Custom Fields
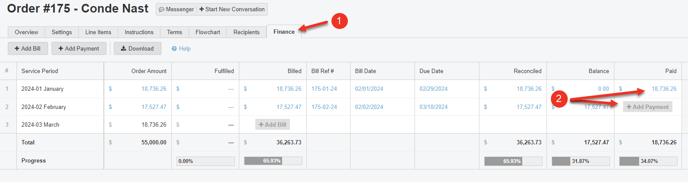
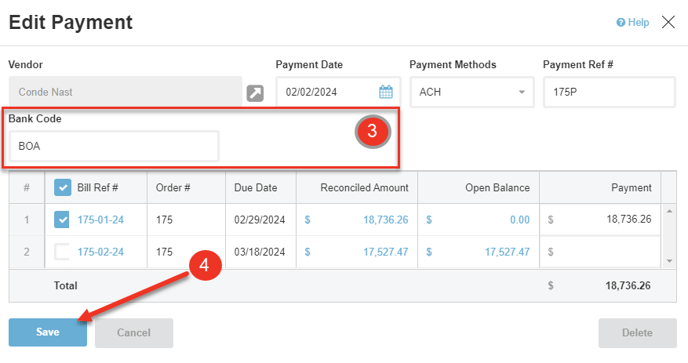
Custom fields for a logged Payment are shown in the Edit Payment dialog. You can get to this dialog by clicking on Payment amount for a Service Period in the Finance Tab of an Order or by clicking on the Ref # of a Payment Type in the Finance Tab on the Organizational level..

Configure Payments Custom Fields
After you have created custom field(s) for Object Type: Bills, you can update the data for your custom fields in a Bill.
- In an Order, click on the Finance Tab.
- Click Add Payment (for a new bill) or Click on the Paid Amount (for an existing bill).
- Configure your Custom Fields.
- Click Save.