Learn in Bionic Academy: Administer Your Account - Intermediate
Custom fields enable you to expand the data you want to track and account for in Bionic. Custom Fields give you flexibility around the data you store and report on in Bionic.
Custom fields can be used to:
- Track additional data related to your placements
- Build your naming conventions and custom tracking URLs
- Enable mapping to other platforms or reporting purposes
Custom data fields can be used for Ads, Advertisers, Vendors, Programs, Campaigns, Placements, Orders, and Bills.
Here, we’ll cover how to:
- Access Your Organization’s Custom Fields
- Understand Custom Fields in Bionic
- Sort Your Custom Fields
- Search Your Custom Fields
- Add a New Custom Field
- Update a Custom Field
- Lock/Unlock Multiple Picklist Fields
- Deactivate & Reactivate a Custom Field
- Delete a Custom Field
Accessing Your Organization’s Custom Fields
Here is where to manage your company's custom fields:
- Click on Your Company Name in the Upper Right Corner.
- Click on Administration.
- Click on the Custom Fields tab.


Understanding Custom Fields in Bionic
Custom Fields have an array of uses in Bionic and we allow them to be used in almost all areas of the platform.
When you create Custom Fields, you will associate the field with the type of object it will relate to. For example, if you create a Placement field called Tactic, it will enable you to identify a tactic for each placement in your media plan. Or, if you create a Campaign field for Objective, you can set a value that will apply to the campaign as a whole instead of individual placements.
These fields can then be utilized for a variety of purposes such as reporting, naming conventions, tracking URLs, and mapping.
You will find there are some existing Custom Fields that are automatically available including fields for DCM to support your DCM import file, and Advantage to support the Advantage import file. You will need to Activate these to utilize them.
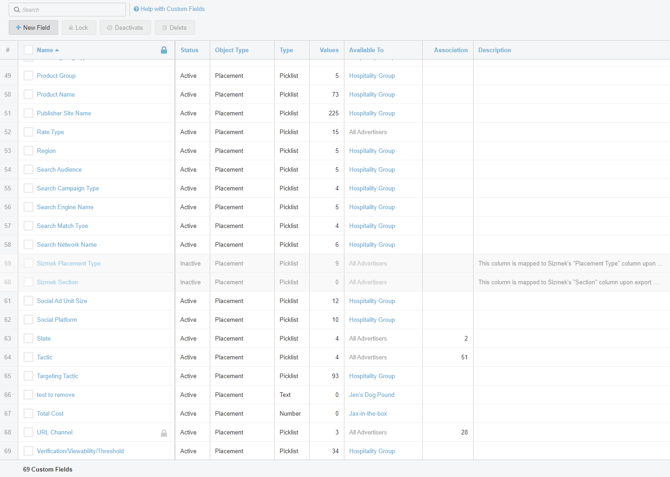
Each custom field has the following attributes:
- Name – The name of the custom field.
- Status – Active vs. Inactive.
- Object Type – This attribute ties the custom data field to what level this field will apply to. For example, if it is a Placement Object Type, the custom data field will be available to be selected in the Media Plan as a custom column. If it is a Campaign Object Type, the custom data field will be available on the Campaign level as metadata. The available object types include Ad, Advertiser, Bill, Campaign, Order, Payment, Placement, Program, and Vendor.
- Field Type – There are 4 Field Types to choose from:
- Date – Date columns enable you to track informational dates not tied to Task due dates. Date format supported is mm/dd/yyyy.
- Number - Number columns can represent any numeric value. You can set the number of decimal placements. Selecting "Can Be Totaled" adds a sum of the values at the bottom of your Media Plan.
- Picklist - A text field that enables a predefined list of values for users to select from. Picklists provide consistency and easier entry when values are repetitive. Picklists also support codes for custom naming conventions or for importing data to external systems.
- Text - Text columns offer the ability to free-type any text values up to 2000 characters. They can be used instead of Picklist columns when their expected values have little to no consistency, such as Job Numbers or PO Numbers.
NOTE: Field Types can be restricted to a set character limit length when using Picklist or Text.
- Values – The number of values the custom field has.
- Available To – Details if the custom field is available to All Advertisers or a specific Advertiser.
- Association – The number of times the custom field has been used/associated with.
- Description – An explanation of what the custom field represents and any other pertinent information.

Lock Picklist
When Lock is selected, users can only select from the available list of values. When not locked (default), users can add to the list of values directly from the media plan. Locking is recommended when no other possible options are available or when standardization is critical.
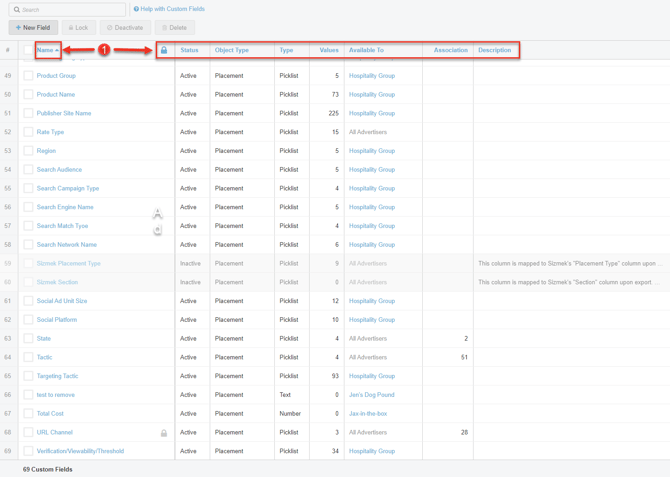
Sorting Your Custom Fields
You can sort the Custom Fields Table by column header. Here’s how:
- Click on the sortable Column Header you’d like to sort by.
Searching Your Custom Fields
In addition to sorting, you can also search for a specific money column using the search bar. The list of money columns will be narrowed by keywords entered.
- Type in the Search Bar (the full or partial) money column name.

Adding a New Custom Field
Here is how to add a new Custom Field for your organization:
- Click on New Field.
- Enter a Descriptive Name in the Name.
- Select Object Type.
- Select Field Type:
- Date - When selected, the custom field will have a date format of mm/dd/yyyy.
- Picklist - When selected, you can enter the values for the picklist and set a maximum length (up to 100 characters) for the each picklist value. Use the Sort A-Z to order the display of the values alphabetically. The picklist values also support short codes, please see Note below. When lock is selected, users can only select from the available list of values. When not locked, users can add to the list of values when updating a custom field.
- Number - When selected, you can set the number of decimal placements for the custom field as well as choosing if the values can be total as a summary at the bottom of your Media Plan.
- Text - When selected, you can set a maximum length (up to 2000 characters) for the text value.
- Select if it is Available to “All Advertisers” or a specific Advertiser.
- Enter Description.
- Click Save.
NOTE: For Picklists Field Type, if values need codes associated with them for your custom Placement Name or extracting data to import to other systems, use the format: display name|code (see image below). Alternatively, you can paste from Excel columns - display name in first column, code in 2nd column. Bionic will automatically translate to the appropriate format.


If Field Type Date is selected:
If Field Type Picklist is selected:
If Field Type Text is selected:

If Field Type Number is selected:

Updating a Custom Field
Once a Custom Field has been added, you can update some of its attributes such as name, advertiser restrictions and description. If Field Type is a Picklist, you will be able to update the values in the Picklist. If you are an Administrator of the account, you will also be able to Lock the Picklist.
Here’s how to update a Custom Field:
- Click on the Custom Field name in the Name header.
- Update the editable fields.
- Click Save.
NOTE: Depending on the Field Type selected, Editable Fields may vary. You cannot change Object Type, Field Type, and Maximum Length once a field has been created.


Lock/Unlock Multiple Picklist Fields
When working with Picklist fields, the values that are available in the menu of options can be locked to ensure that users cannot modify the list. If you lock the values, only an Administrator user will be able to modify this list.
- Click on the checkbox(es) next to the Name of the Custom Field Picklist you want to Lock/Unlock.
- Click on the Lock/Unlock.

Deactivating & Reactivating a Custom Field
If you have Custom Fields that you no longer want users to see, you can deactivate them. This will retain historic data where it was used in the past, while making it unavailable for use in the future. You can also reactivate Custom Fields that have been deactivated.
Here is how to deactivate/reactivate Custom Fields:
- Use the checkbox next to the name to select which Custom Field(s) to deactivate/reactivate.
- Click on the Deactivate or Activate button as appropriate

Deleting a Custom Field
Here’s how to delete a Custom Field:
NOTE: Custom Fields can only be deleted if they are not in use. Otherwise you would either Deactivate, or remove the field from anything it is associated with.
- Use the checkbox to select which Custom Field(s) to delete.
- Click on the Delete.
