Set up Program Benchmarks
Here's how to set up benchmarking for your programs.
Table of Contents
Tip: Learn more about Benchmarking Your Programs.
Set Up Benchmarking
In order to look at benchmarks, you will need to start by identifying the programs you want to compare.
- Log in to Bionic for Ad Sales
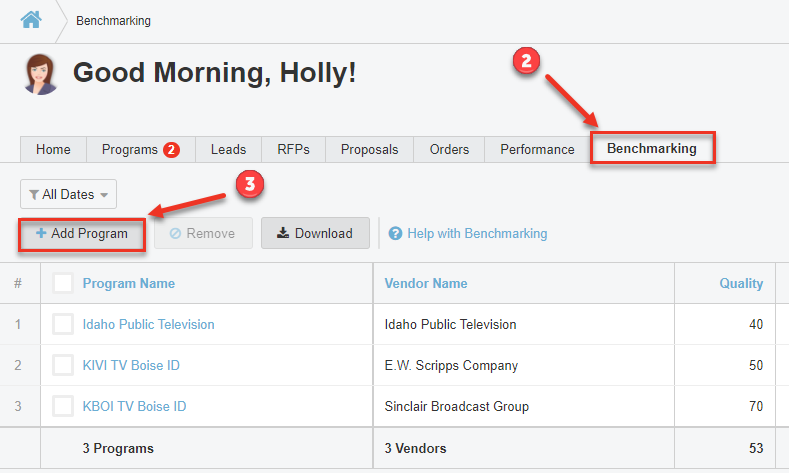
- Click on the Benchmarking tab.
- Press the Add Program button.
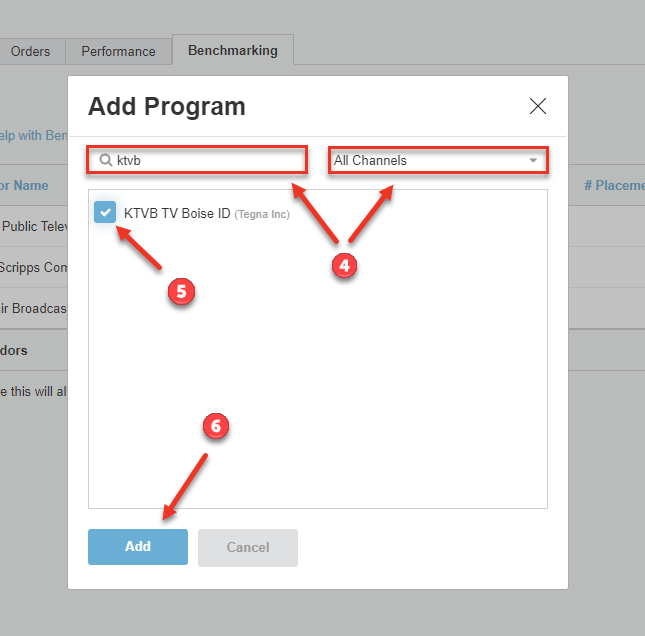
- Use the Search and/or Channel Filter to help you find programs to compare.
- Select the program(s) you wish to compare.
- Press the Add button.
- Repeat steps 4 & 5 as many times as necessary to add all of the programs you wish to compare.
Note: The Benchmarking tab is specific to you. Other users in your company can compare against programs of specific interest to them.
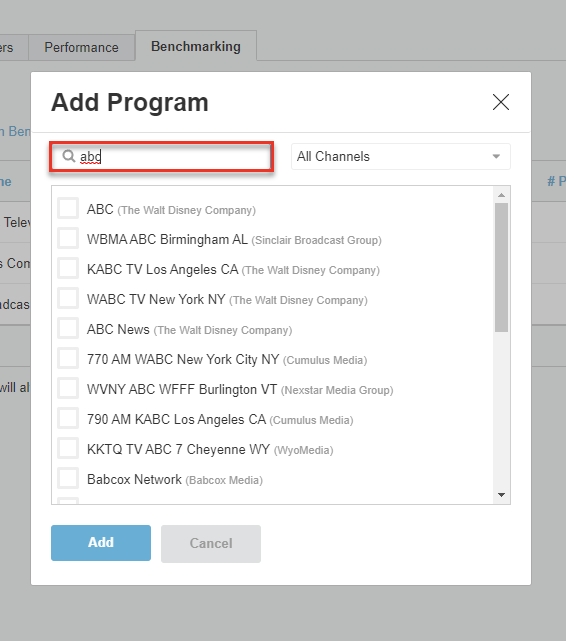
Search
The Search function will help you find programs by Program Name. The name could include the specific brand such as Wired, call letters such as WABC, or even a city such as Boston.
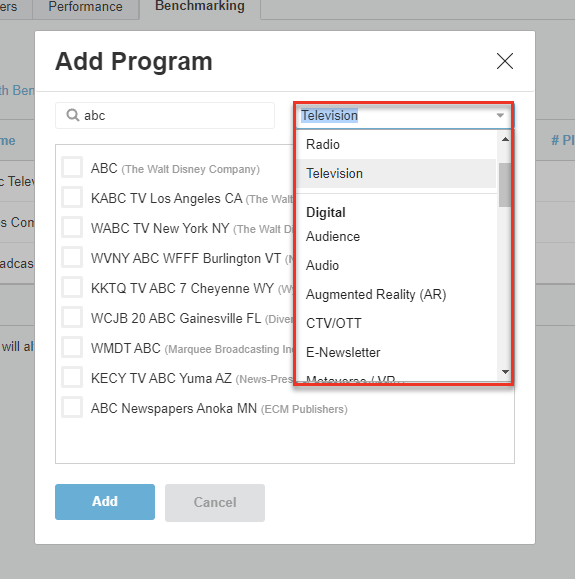
Filter
The channel filter can be use separate or in combination with the program name search.
Limit View By Timeframe
Data reflected in benchmarking defaults to across all time. While this can be useful, it can be more helpful to look over a specific period of time. This allows you to review how trends and changes may have impacted your business. For example, you may want to look at a comparison of data for last year to see where things stood. Then use that to set goals and track data for this year.
Use the Date Filter to select a time frame to limit data to. Data will automatically update to reflect for the time period selected.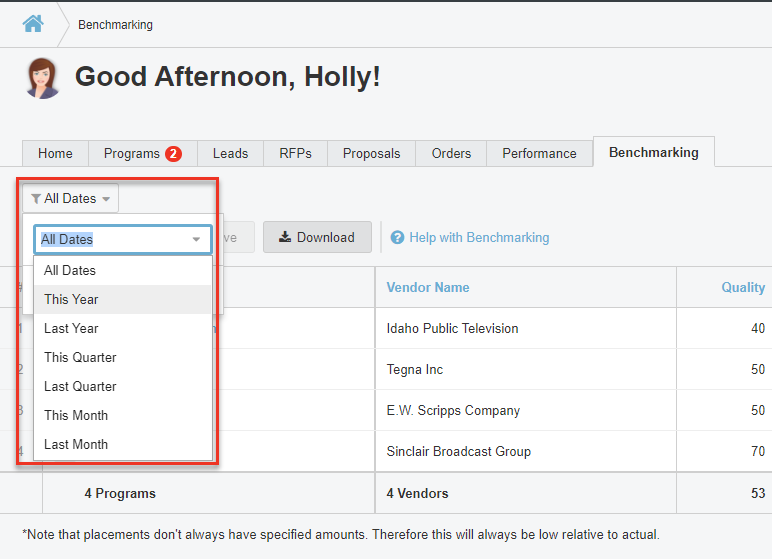
Remove Programs
If there are specific programs you no longer want to include in your benchmarking, you are able to remove them. You can always add them back later as needed.
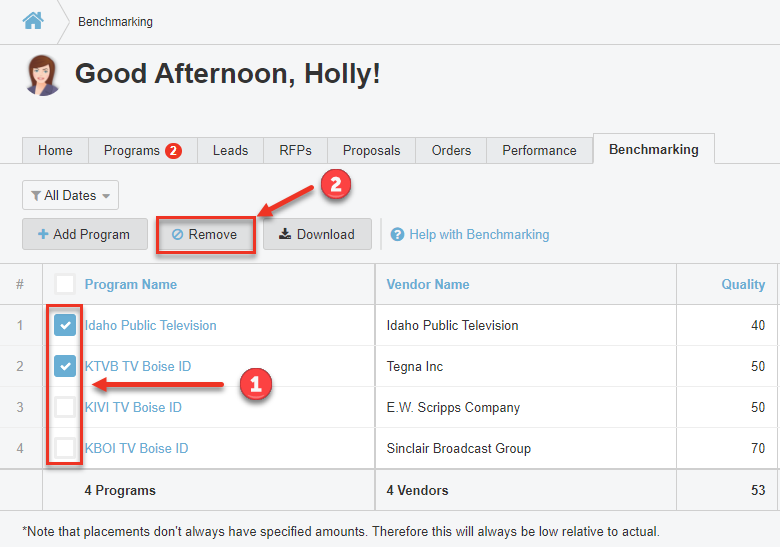
- Select the Program(s) you want to remove by placing a check mark next to each one you wish to remove.
- Press the Remove button.
Understand Your Benchmarking Results
Each program you selected to compare will display in your view.
Note: The data in the screenshot below is for visualization purposes and may not reflect real data in Bionic
- Program Name - This is the name of the Program (brand/station, etc). You can click on the name of the Program to see a read-only view of the Program listing, which include the description, contacts, profile, and Product listing.
- Vendor Name - This is the company that owns or represents the program.
- Quality - The Quality score is based on a 1-100 scale that looks at the presence of specific data in the program listing such as Description, an Image, Products, Contacts, etc. Learn more about quality and how to improve quality scores.
- Visibility - The Visibility indicates whether the program is a Premium or Standard listing. Premium listings receive higher visibility to media planners when they are researching programs to include in their media plans. Learn more about Low and High Visibility.
- # Agencies - The number of agencies that included at least 1 placement from this program in a media plan in the given timeframe.
- # Placements - This will provide a total count of the number of placements the program has been added to within agency media plans. While helpful alone to see activity, it can also be used in conjunction with the $ Placements to get a sense of average placement spend.
- $ Placements - This is a sum of the total spend for this program across all placements. This may not reflect the true total, as some agencies do not include specific amounts in their media plans.
- Market Share - This reflects the percent of market share for this program against the other programs in this view.
Download Benchmark Data
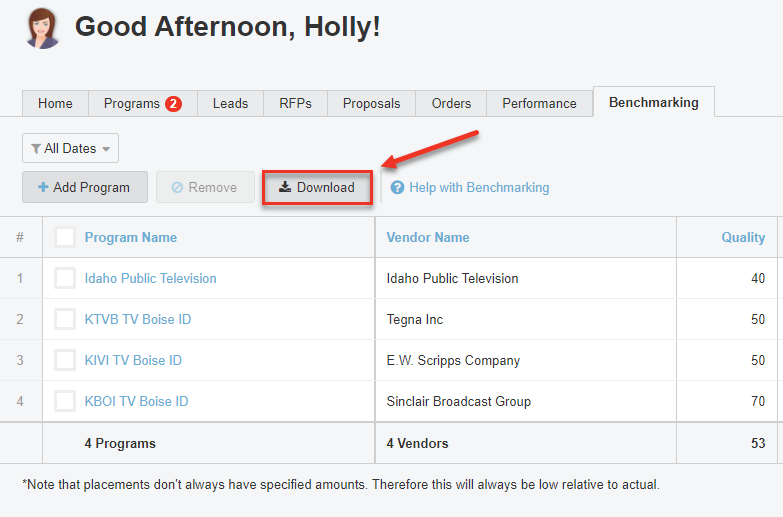
While looking at the benchmarking data, press the Download button to download a copy of your results in Excel format.
