Table of Contents
The Products tab on your Program displays the spectrum of advertising opportunities you offer for this program across all channels. Each type of banner ad, print ad, etc. will be listed out individually, giving media planners a sense of what you offer.
This list of products will be available when you create proposals and when media planners use this program in their plans, saving everyone time and effort.
You will need to include at least one product, but should at least include all primary offerings.
You can add, edit, and remove Products as needed.
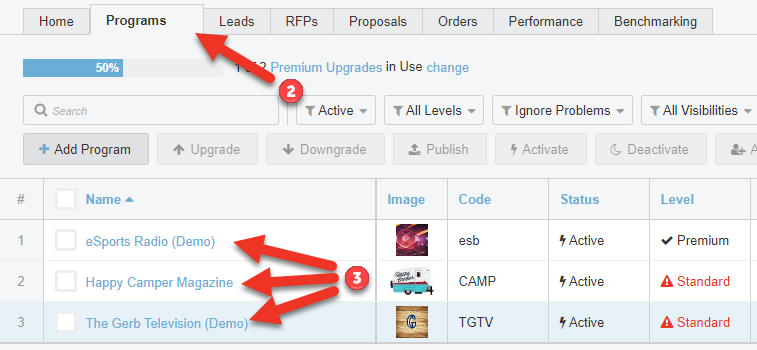
Access Your Products
- Log into Bionic for Ad Sales
- Click on the Programs tab
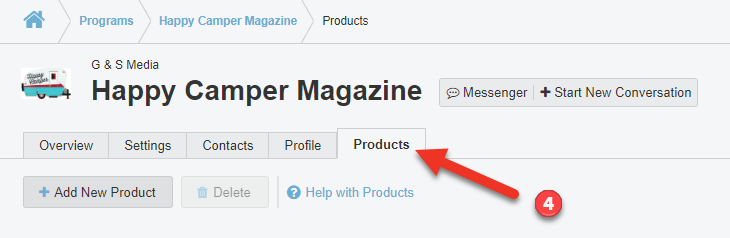
- Select the program you wish to add/edit products on
- Click on the Products tab
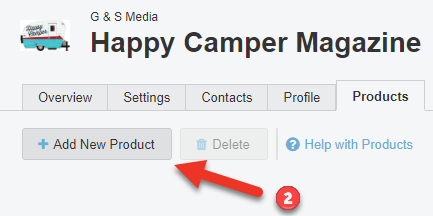
Add a New Product
To add a New Product:
- Access the Products tab
- Click the Add New Product button.
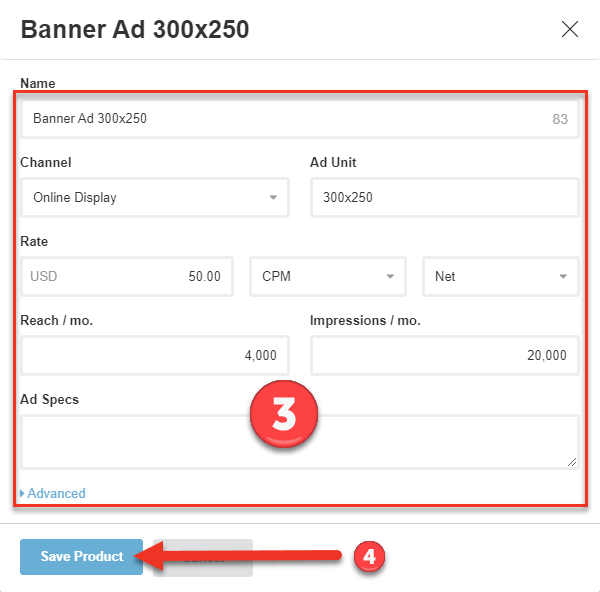
Enter Product Details
Enter the details of the product. This box can be used for any channels you offer including digital, print, OOH, broadcast, and social.
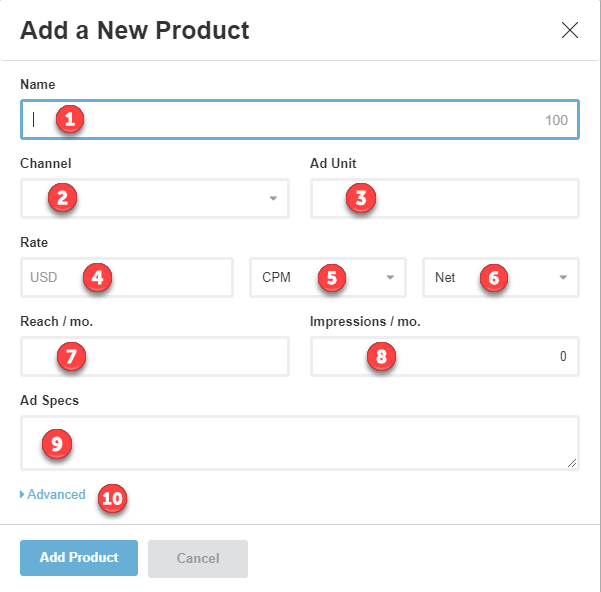
- Name - The simple product name such as Leaderboard (digital), Quarter Page (print), Sponsored Post (social), Billboard (OOH). For broadcast, you can opt to list out all options such as shows you can buy, or you can generically use TV Spot or Radio Spot.
- Channel - Select the appropriate channel from the list provided. If there isn't a related channel, use the Other option. You can request new channels by contacting Bionic Customer Support.
- Ad Unit - Some channels will offer a list of Ad Unit options to choose from. You can choose from that list when available, or manually enter a new Ad Unit.
- Rate - This will include Rate, Method, and Gross/Net. You may enter Rate Card rates here, and adjust as appropriate for specific proposals.
- Method - This will reflect how the cost should calculate. Choose from options such as Cost Per N, Each, Flat, Time Based, and more.
- Gross/Net - Select whether this price is reflective of a Gross Rate or Net Rate.
- Reach/mo - Enter the Reach per month for this product. This number can be changed for specific proposals.
- Impressions/mo - Enter the Impression per month for this product. This number can be changed for specific proposals.
- Ad Specs - Enter the ad specifications for this product. You can copy/paste from another document as needed. It is limited to 4,000 characters.
- Advanced Options - You can expand the Advanced options to include more detail typically related to broadcast products.
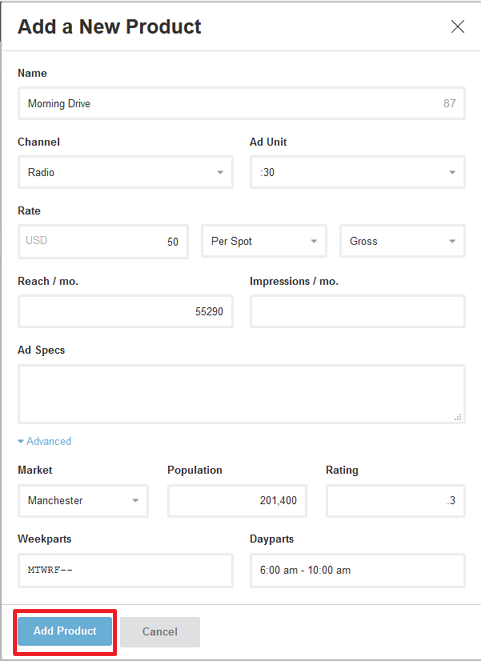
Add Advanced Product Details
Press the Advanced link to expand the box.
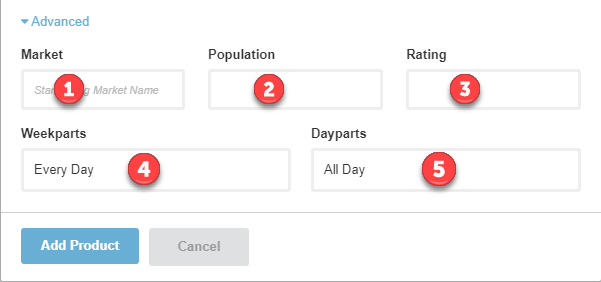
- Market - Start typing the market and select from the list. Bionic includes cable, Nielsen, US Census, and other markets. Additional markets can be added upon request - just contact Bionic Customer Support.
- Population - Enter the population for the market selected.
- Rating - Enter the Rating for this specific product.
- Weekparts - Select the days of the week this product is available.
- Dayparts - Identify the applicable times.
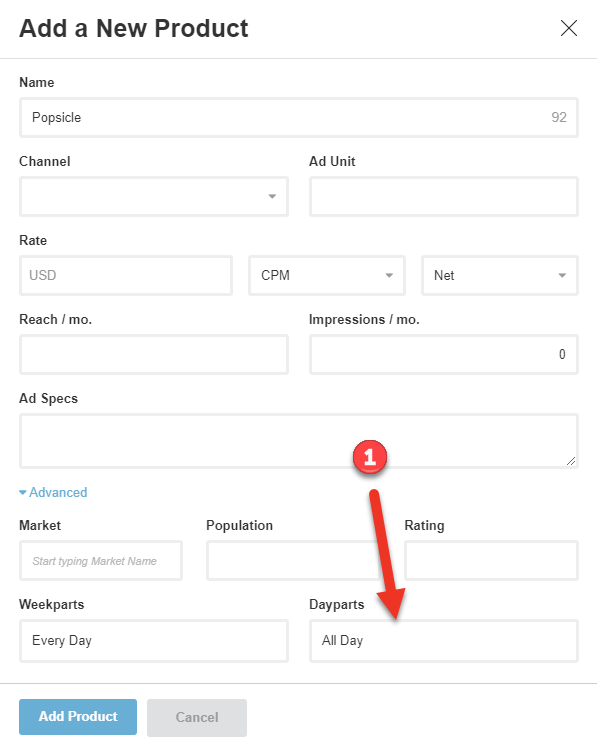
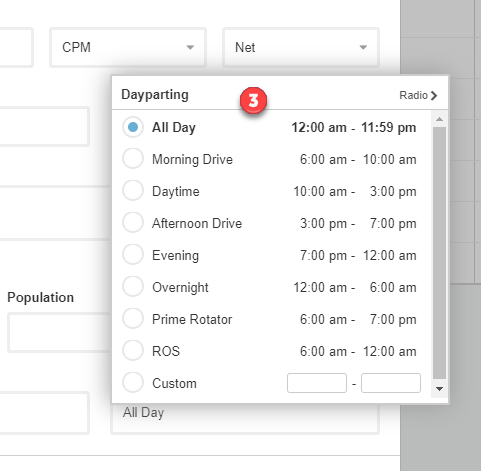
Use Dayparts
- Click in the Dayparts box
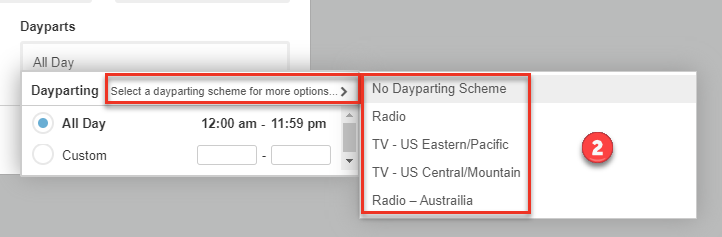
- Identify the daypart scheme to use
- Once you select the applicable scheme, select the appropriate time option from the list, or enter a custom time.
Save a Product
Once complete, press the Add Product button to save your changes.
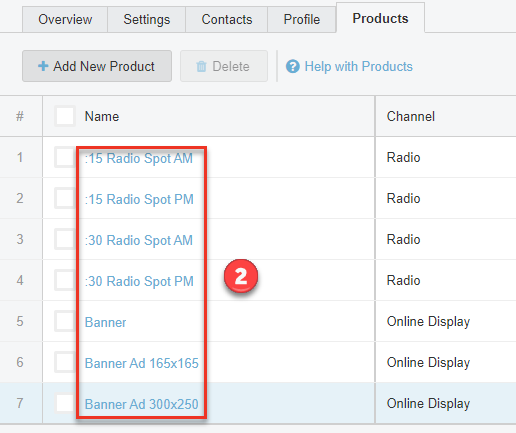
Edit Your Products
You may update the details of any existing products by editing them.
- Access your Products
- Click on the Product you wish to edit
- Make any changes you need to make
- Press the Save Product button.
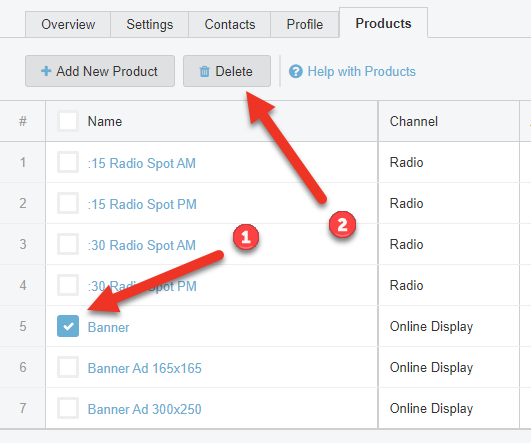
Delete a Product
If any products are listed that should not be included on this program, you can easily delete them.
- Access your Products
- Select the product(s) you want to delete.
- Press the Delete button at the top of the page.
- The product will be removed from the listing.