Flighting enables you to break out a placement based on time periods that need to be tracked individually. Each flight can have varying costs and quantities. These breakouts can easily be setup and modified in the plan.
Tip: Flights are a great way to include blackouts.
Typical flighting scenarios may include:
- TV/Cable/Radio buys flights by broadcast week
- Placements with a set monthly budget
- Accounting for blackout periods
- Varying cost or KPI expectations during specific periods
Table of Contents
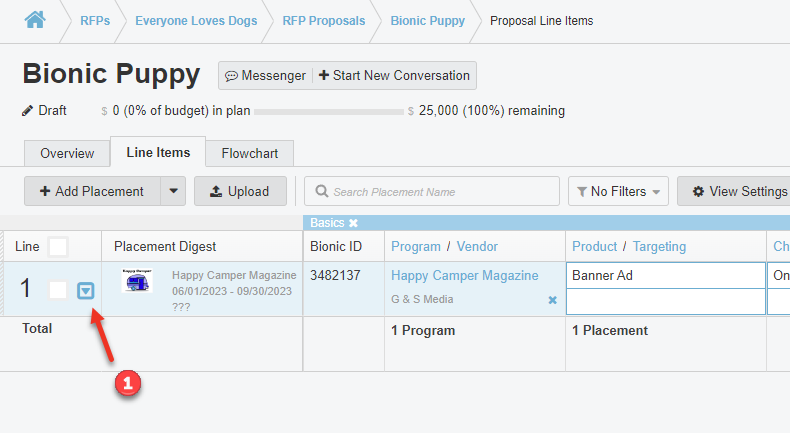
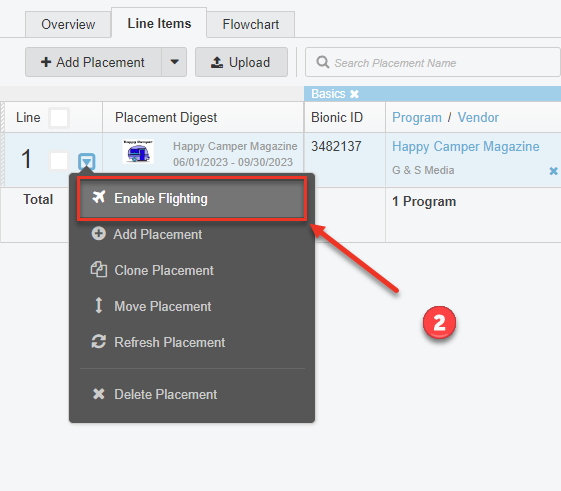
Add Flighting to a Placement
- Hover over the line you would like to add a flight to and click on the blue arrow
- Select Enable Flighting
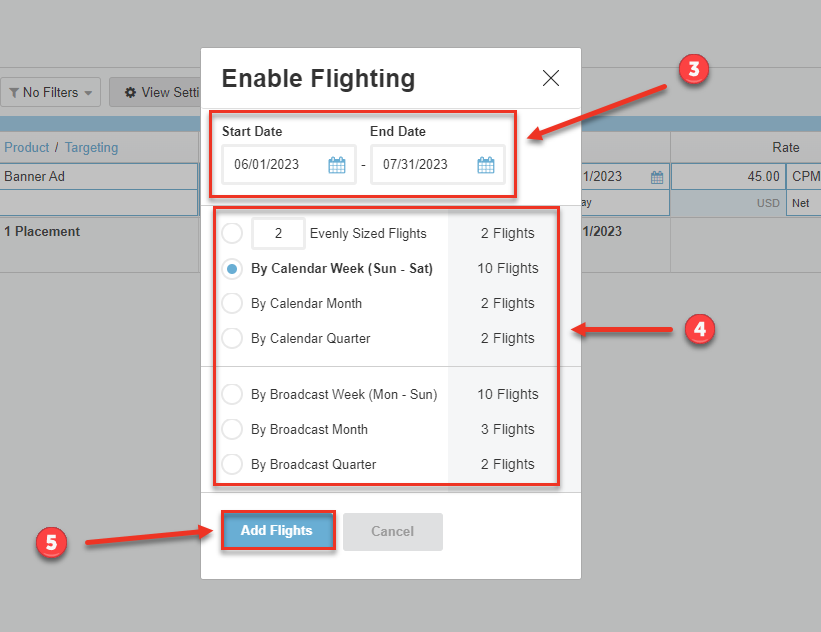
- Select the time frame your flights will cover
- Choose the Flight Option you wish to use
- Press the Add Flights button
- Configure your flight
Understand Flight Options
There are multiple options to choose from when creating a flight:
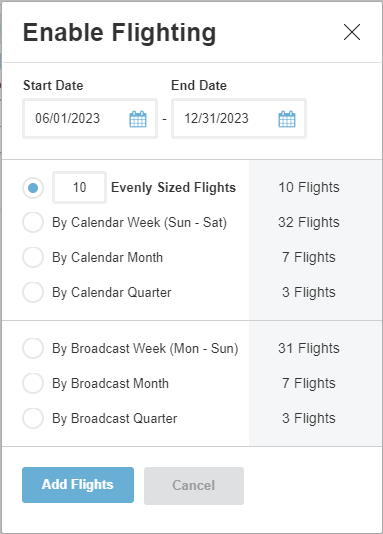
- Evenly Sized Flights - Choose any number of flights that will be spaced evenly throughout the time period selected.
- By Calendar Week - A flight will be created each calendar week (Sun-Sat).
- By Calendar Month - A flight will be created for each calendar month.
- By Calendar Quarter - A flight will be created every quarter of a year in the given time frame.
- By Broadcast Week - A flight will be created every broadcast week (Mon-Sun).
- By Broadcast Month - A flight will be created each broadcast month.
- By Broadcast Quarter - A flight will be created for each broadcast quarter in the given time frame.
Interpret Your Flight
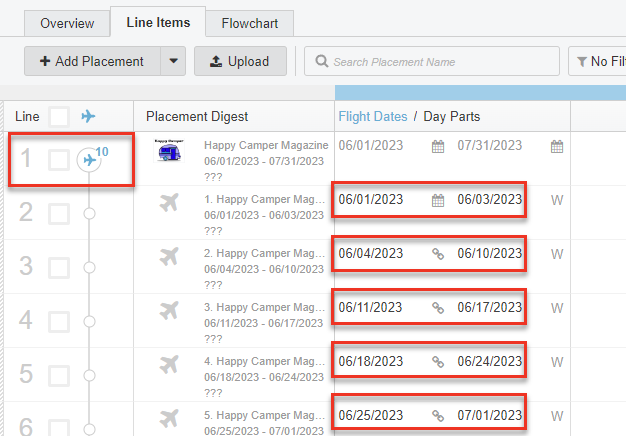
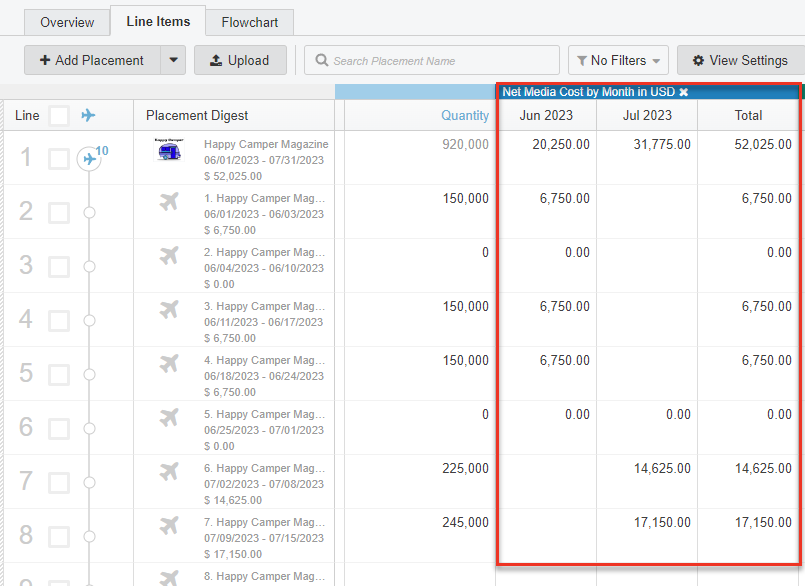
Once you have added your flight, you will see that your line items look like the image below.
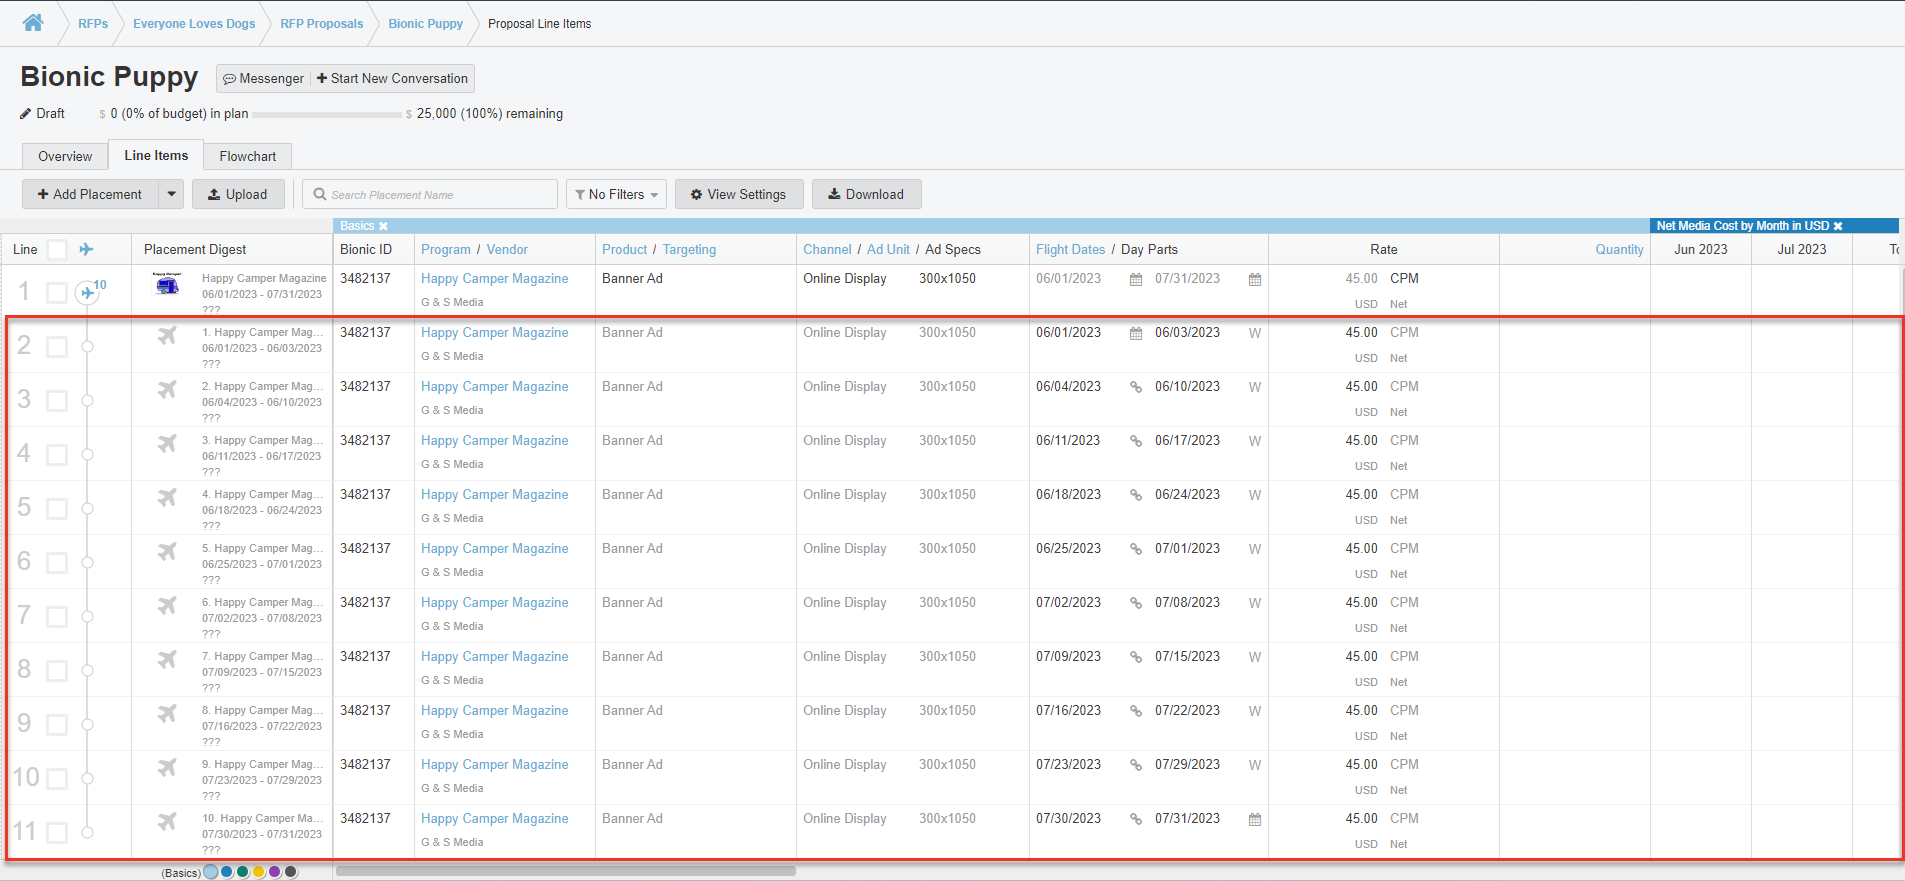
The first line in a flight is the summary. Each line below the first in this example is using Week.
Configure Your Flight
Now that we have each week separated by a flight, we can configure each flight.
- Changing the Dayparts for each week (Does it run each day?).
- Changing the Time Slots for each week (Does it run all day, or during certain hours?).
- Setting the Rate for that week (Are there certain weeks that the cost is greater due to the time of year, or time of day?).
- Changing the Quantity for each week (How many times will it run in that timeframe, or what are the Impressions that week?).
Tip: Setting a Quantity to 0 is a great way to indicate blackouts!
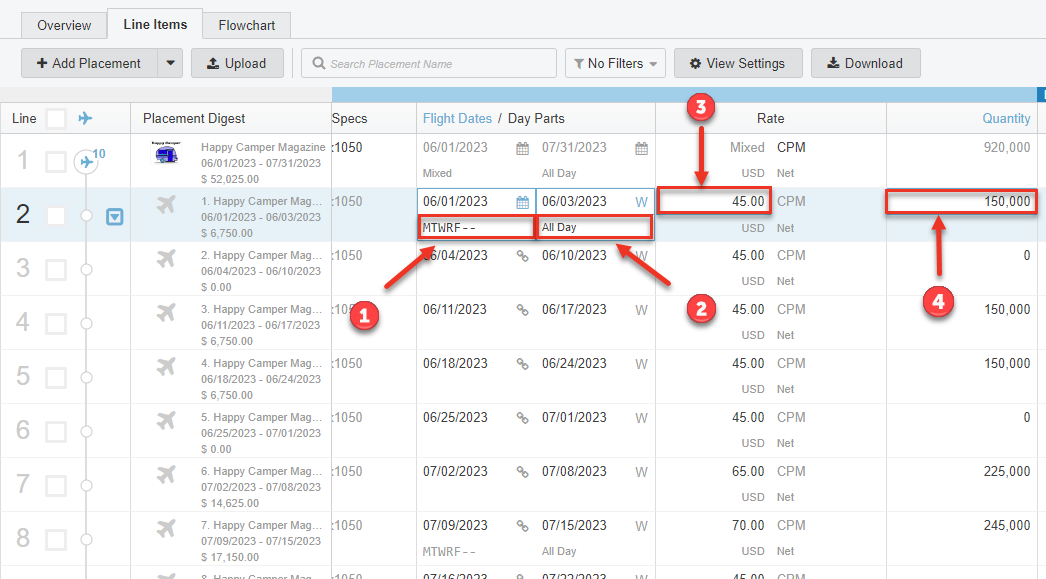
After these configurations have been made, you will see your costs broken down by month.
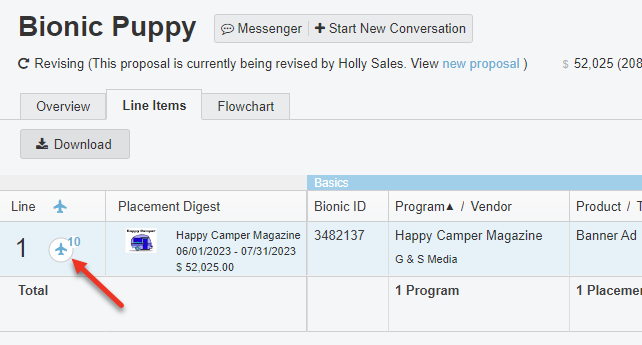
Remove Clutter
Once you have configured your flights, click on the airplane to minimize the flights so that the summary is the only line shown. You will see a number next to the plane, showing how many flights are attached to this placement, indicating there are flights that are hidden.