If you receive an RFP, you can invite your teammates to access the RFP to help you to respond:
- See List of RFP Recipients.
- Add Recipients as needed.
See RFP Recipients
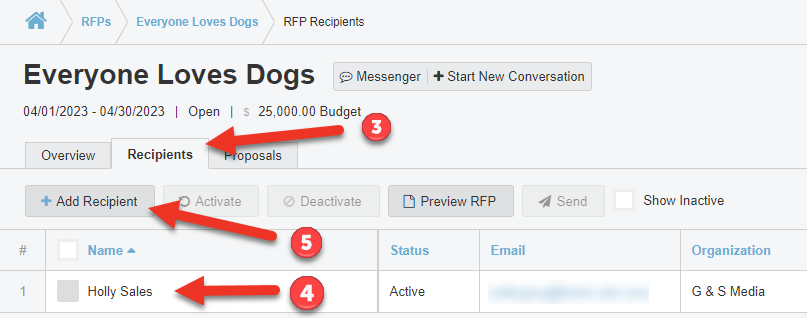
To see the list of recipients:
- Log in to Bionic for Ad Sales.
- View Your RFP.
- Click the Recipients Tab.
- See list of current recipients.
- If anyone is missing, you should Add Recipient.
Note: If you see a recipient outside of your company on this list, contact the media planner who sent you the RFP for an explanation.
Understand the Recipient List

- Name - The name of the recipient.
- Status - Identifies whether this is an active recipient. An inactive recipient cannot access the RFP. Only active recipients will display in the default view.
- Email - The email address of the recipient.
- Organization - The company name of the recipient.
- Sent - The number of times an invitation was sent to this recipient.
- Last Sent - Date an invitation was last sent to this recipient.
- Last Opened - Date the RFP was last viewed by this recipient.
- Proposals - The number of proposals submitted by this recipient.
- Created - Date/time the recipient was added to the RFP.
- Created By - The person who added this recipient.
- Updated - Date/time an the last update was made to this recipient (deactivated/activated)
Add a Recipient
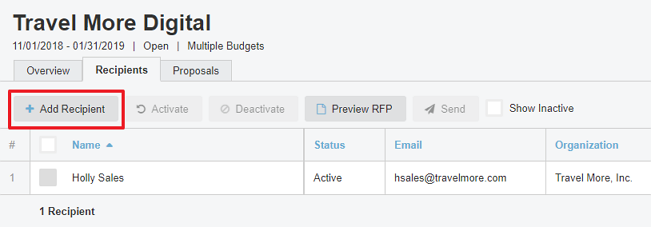
To add a recipient:
- Go to Recipient List.
- Press the "Add Recipient" button.
- Add recipients using email address or by program lookup.
- Send invitation.
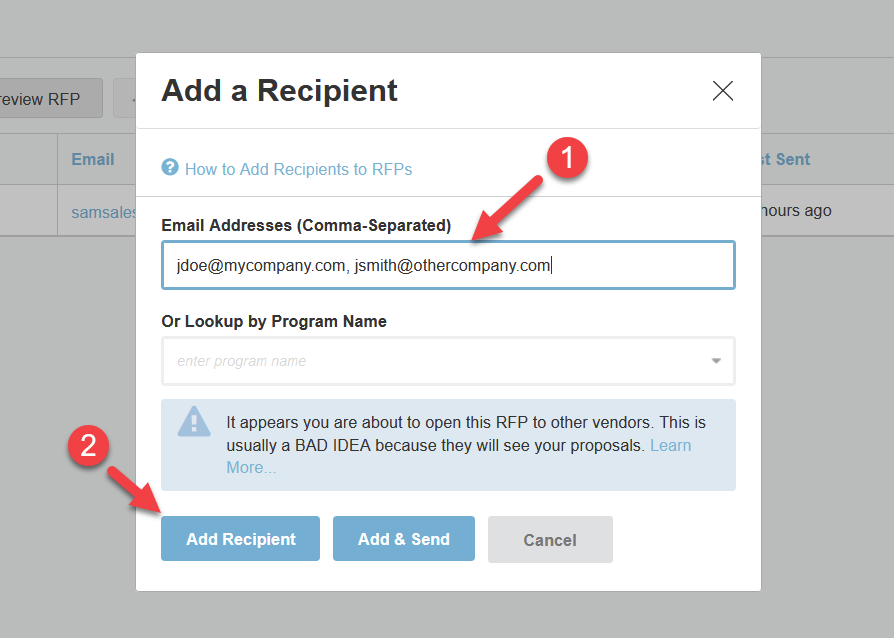
Add a Recipient by Email
From the "Add a Recipient" you can add recipients using their email addresses:
- Enter one or more email addresses (comma separated).
- Click the "Add Recipient" or "Add and Send" button.
- For email addresses that match current users, they will be added immediately.
- If no match is found, Bionic support team is notified so a new account can be set up for that person.
Note: If the recipients in your list do not have the same email domain, you will receive a warning.
Note: There are cases when you may want to invite recipients from other organizations. The warning below is intended to prevent you from accidentally sending across vendors if that is not your intention. All recipients added to this list will have view access to the RFP details and all proposals submitted in response to it.
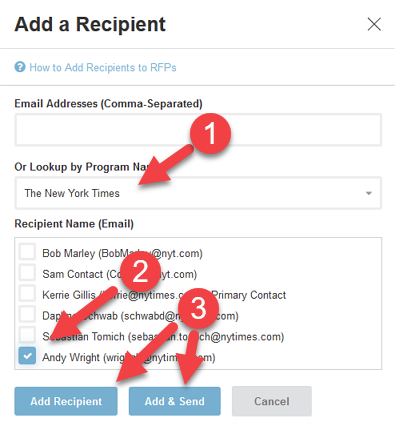
Add Recipient by Program Lookup
From the "Add a Recipient" button you can add recipients by using program lookup:
- Enter the name of the program in the "Lookup by Program Name" field.
- Select one or more recipients from the list.
- Click the Add Recipient or Add and Send button.
- For email addresses that match current users, they will be added immediately.
- If no match is found, the Bionic support team is notified so a new account can be set up for that person.
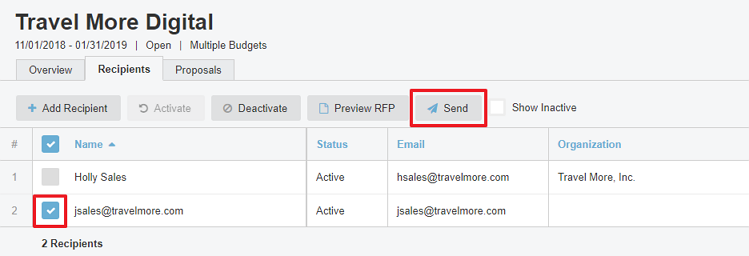
Send an RFP Invitation
Add & Send will add the recipient(s) & send the invitations immediately.
Add Recipient will add the recipient(s) to the list, but won't send an invitation. To send an invitation:
- Select one or more recipients.
- Click the "Send" button.