Learn in Bionic Academy: Manage Orders
Regardless of the type of media, you will utilize orders to track the placements that make up buys, manage order statuses, generate insertion orders, and performance reconciliation.
Bionic makes setting up orders easy by using the placements in the media plan, so you just need to define what to order.
In this article, we'll cover:
- Create New Orders
- Configure Order Settings
- Enter Order Instructions
- Configure Order Terms
- Configure Order Flowchart
Create New Orders
You will need to start the process by creating new orders. Here's how:
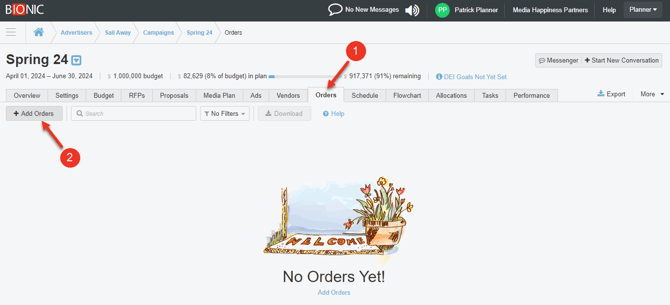
- In a Campaign, click on the Orders tab.
- Press the Add Orders button.
- Select Append to Existing Orders (if any) or Always Create New Orders:
- Append to existing orders - Use when you need to add placements to existing orders.
- Always create new orders - Use when you need to force placements into new orders instead of existing orders for the same Program or Vendor.
- Select One Order Per Program or Per Vendor:
- One order per program - Use when you want to break out orders based on the Program
- One order per vendor - Use when you want to create 1 order based on the Vendor that may include more than one program. Example: Cable buy across networks under the 1 cable provider. Or ad sales reps more than 1 station that should be in 1 single order.
- Select the Programs or Vendors to create order for.
- Press Add Orders.
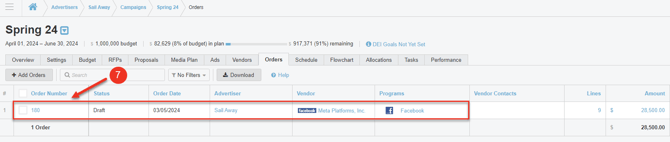
- Bionic will create an order for each item based on the rules you selected and assign an order number.

NOTE: Contact Bionic Customer Support if you would like to configure a specific starting order number, or manual order numbering to change the current order numer. By default, orders start at 1.
Configure Order Settings
The orders settings enable you to control line item details, calendar, order currency, order date, and buyer contact.
Line Item Details
When configuring order settings, you'll first want to review line item details. The Line Items tab will display critical placement details necessary for the vendor. You can control the view or the columns that display here:
- In an order, click on the Line Items tab.
- Use the drop down menu to select the appropriate view for the type of buy.
- Universal Format - This is a view that is similar to the media plan. Using this view will enable to you select which columns are presented.
- Broadcast - Spots by Week - This is a more traditional broadcast presentation of the buy that is good for TV, Radio, and Cable orders. Cannot be customized.
- Digital - Net Media by Month - This presents the buy broken out by costs per month. Good for programmatic, social, and search buys. Cannot be customized.

Configure Settings
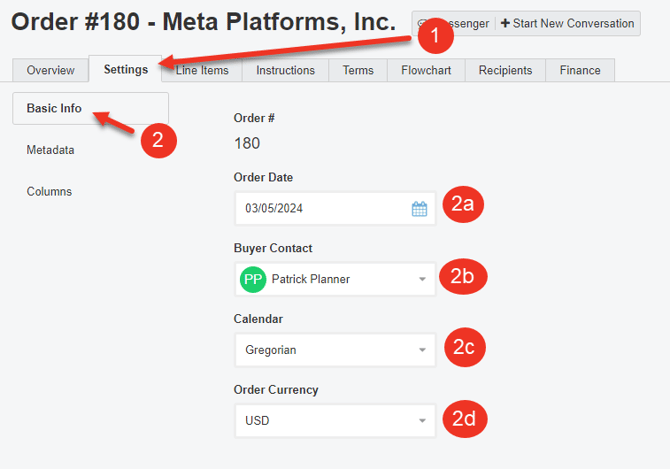
- Click on the Settings tab.
- In the Basic Info section:
- Change the Order Date if needed. It will default to the order create date.
- Select the Buyer Contact. It will default to the user who created the order.
- Select the Calendar (Gregorian or Broadcast) by which financials should be calculated.
- Select the Order Currency, if different than the default.
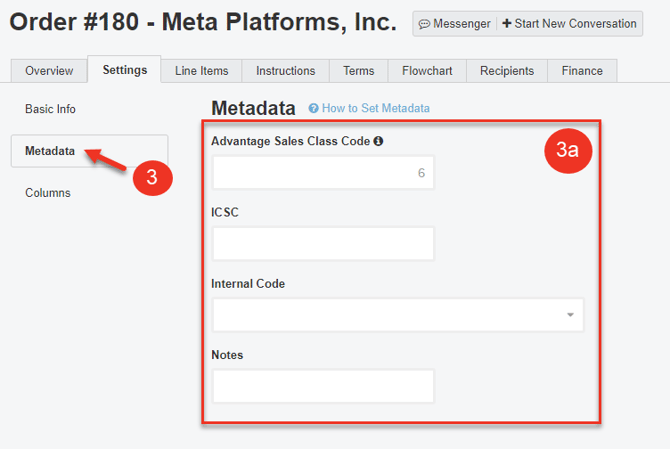
- Go to the Metadata section:
- Enter any required metadata information.
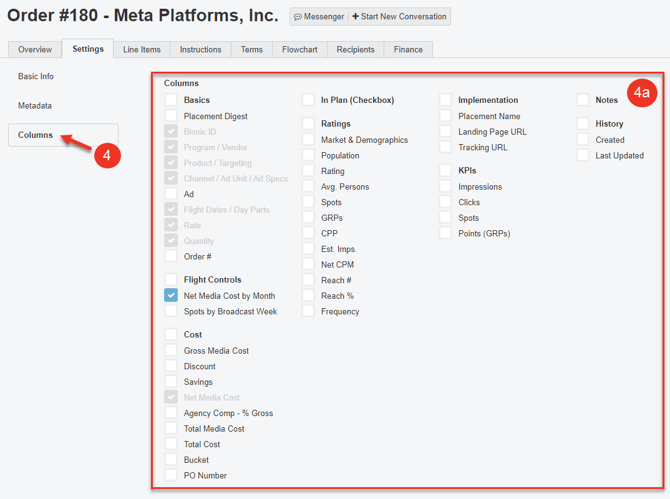
- Then, click the Columns section:
- Select any columns you want to add/remove in the Line Items tab. These selections will only be applicable to the Universal Format.
Enter Order Instructions
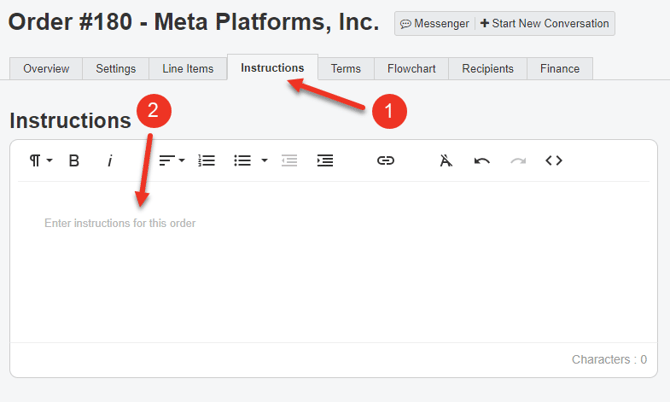
Order instructions will allow you to include additional information specific to this order. Here's how to update order instructions:
NOTE: This will NOT be the legal content.
- Click on the Instructions tab.
- Enter any Instructions you would like to include to this vendor.
Configure Order Terms
You are able to include specific legal terms and billing information. This information can be set up in the Administration section so it will automatically pull through.
Here is how to configure organizational level settings to carry into orders:
TIP: You can set Default Terms here: Manage Order Terms.
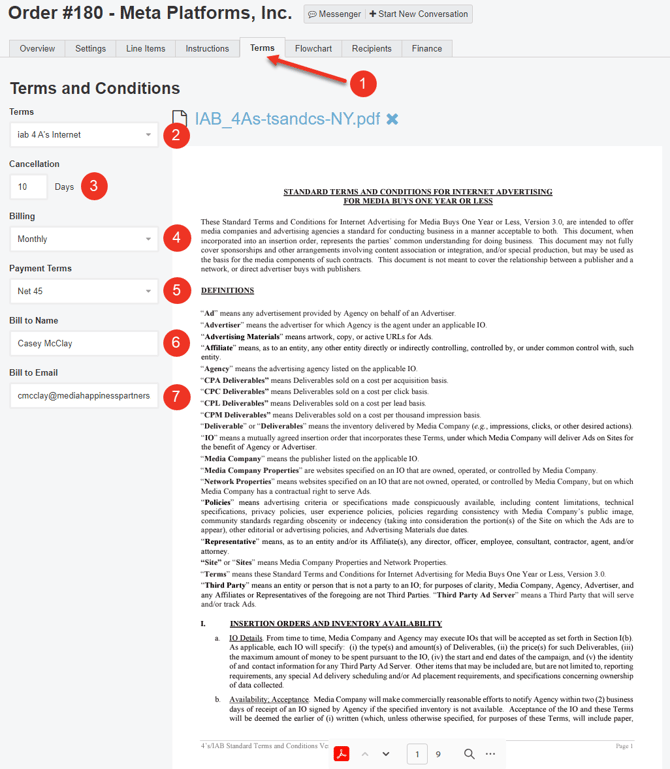
Here is how to set or adjust billing information and legal terms from within the order:
- Click on the Terms tab.
- Select Terms from the dropdown menu or enter in the Terms field. This will default to the terms you have set as default in your Administration settings.
- Enter the Cancellation term.
- Select the Billing term.
- Select the Payment Terms.
- Enter the Bill To Name.
- Enter the Bill To Email.
Once you have completed the set up, your changes automatically save. You can close out of the order, or continue with Approvals.
Configure Order (IO) Flowchart
Every Order (IO) already includes a flowchart giving you a visual overview of your order line items at a glance. Simply click on the Flowchart tab to display the line items in the flowchart view. This display can be configured and customized to fit the specific information you want to present to your vendor.
Here's how to view the order flowchart:
-
Open an Order (IO).
-
Click on the Flowchart Tab.


The flowchart includes several options to help you tailor the display to your needs:

-
All Dates: allows you to set a custom date range for the flowchart.
-
Group By: lets you change how line items are organized and displayed.
-
Calendar Month: lets you switch between calendar presets, such as Broadcast calendars.
-
USD - US Dollar: allows you to select the display currency shown in the flowchart.
-
Fit to Width: scales the flowchart to fit on a single screen without scrolling.
-
Download: exports the flowchart exactly as it is currently displayed.