You will need to add Programs when new advertising opportunities arise not already included in Bionic.
This could be a new website, publication, programmatic or social platform, TV, or radio station. The program will contain all of the pertinent information related to advertising through that brand, including products, rates, contacts and more.
Table of Contents
Add a Program
- Go to your Programs tab.
- Click the Add Program button.

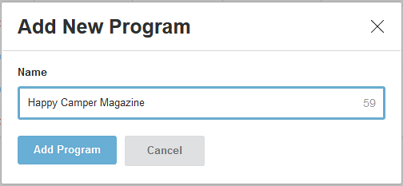
Give Your Program a Name
In the Add New Program box, enter the name of the Program.
As with your children, it's important to give your programs a good name.
The name should make it easy for a media planner to find it in a search. It should also look good in a media plan.
Here are some sample names you can use to help you:
- Brand or publication: Facebook, Men's Health (include country if primary focus is to a specific country outside of the US)
- Local publications: Almanac Weekly Kingston NY (include town & state / country for clarity)
- TV Station: WATE TV Knoxville TN (include town & state / country for clarity)
- Radio Station: 100.1 FM KJBI Pierre SD (include town & state / country for clarity)
Press Add Program when complete.
Once complete, you will fill out each section of the program details.
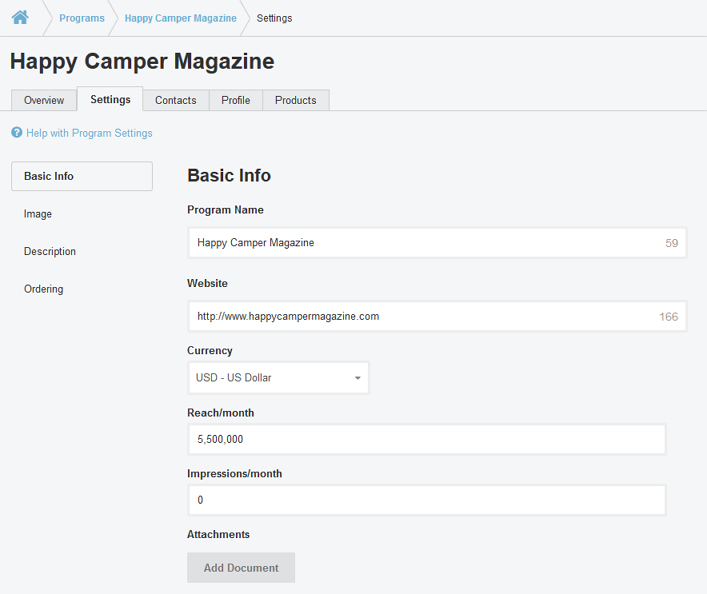
Program Settings
Program Setting provide general information about this program including the name, website, reach, impressions, description, and ordering information. You can also upload an image to represent the brand visually.
Tip: Detailed instructions and information about this section can be found here.
Contacts
Contacts will provide media planners the name, email, and phone of any sales contacts that should be listed on this program.
You can opt to provide 1 or 2 key contacts that will pass along sales opportunities to appropriate sales staff, or you can list out all sales staff.

Note: Keep your contacts up-to-date!
Media buyers use this contact information for sales questions, RFPs, and orders.
Tip: Detailed instructions and information about this section can be found here.
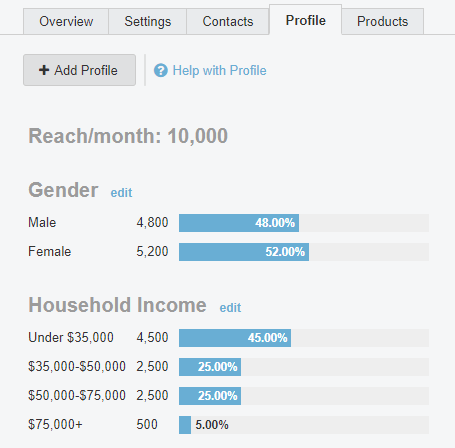
Profile
The profile highlights important demographic, firmographic, and/or geographic information about this brand's customers, viewers, visitors, etc. as appropriate.
Media planners love to have a general idea of the type of people they will be marketing to when buying through you.
Tip: Detailed instructions and information about this section can be found here.
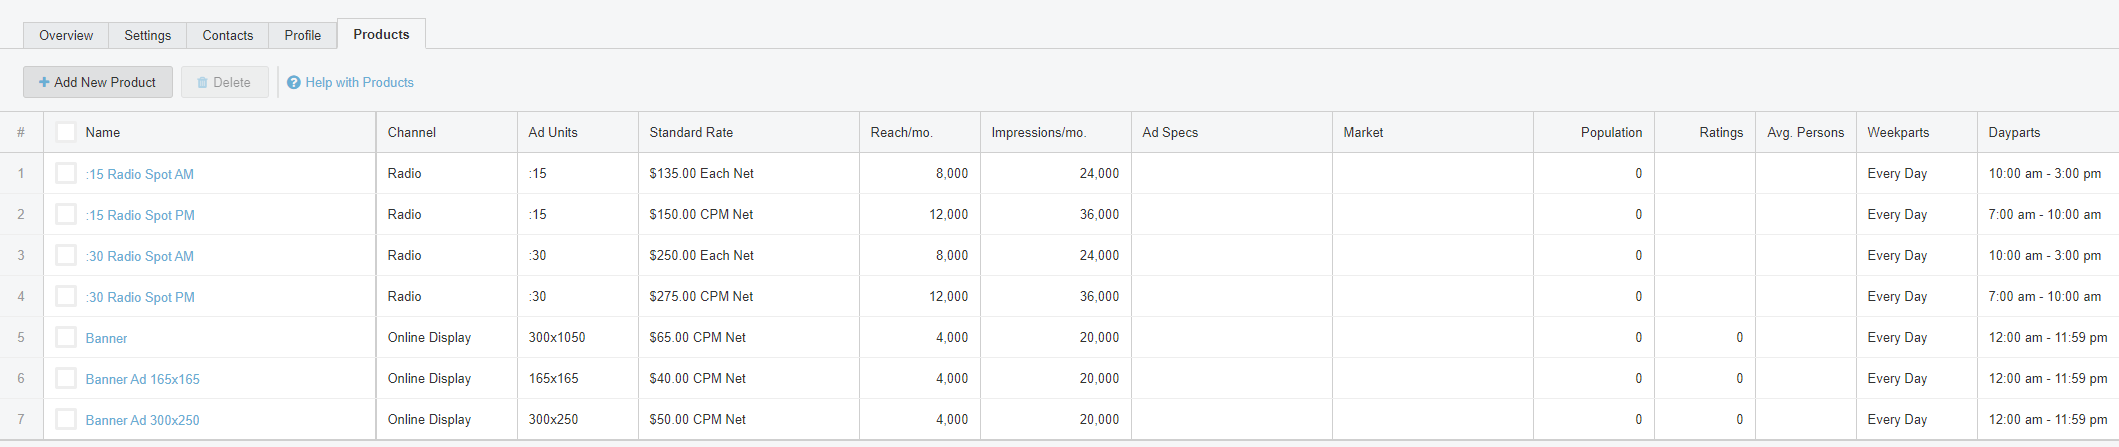
Products
Product represent the advertising opportunities offered within this brand across all channels.
Whether it's a Leaderboard, TV Spots, Full Page print ad, or Billboard, you will want to include all main product options you offer.
You can also provide rate card rates, reach & impressions, ad specs, and more. This data will be available for use when building your proposals, as well as for planners researching and building their media plans.
Tip: Detailed instructions and information about this section can be found here.
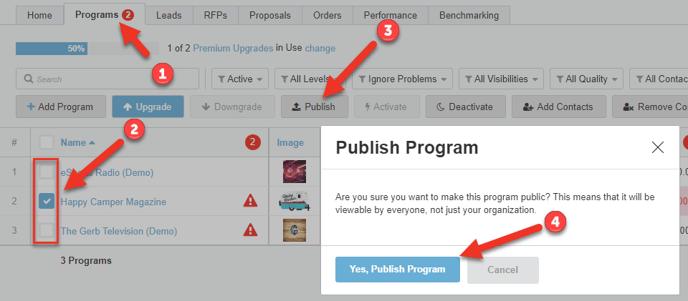
Publish Your Program
Once your program has been created, you will want to publish it so that media buyers can find it in their catalog.
- Go to your Programs list.
- Check the box next to the program you wish to publish.
- Press the Publish button.
- Press the Yes, Publish Program button.