Table of Contents
You can think of Programs in Bionic as standardized media kits or rate cards.
Each of your programs include key information that media planners and media buyers need to discover, understand, and buy from you. Your programs include key information such as:
- Description of your advertising program
- Advertising options, pricing, and reach
- Audience profile
- Sales Contacts
Note: Media buyers use your programs to send you RFPs and to place orders. It's important for you to keep your programs up-to-date.
Manage the Programs Tab
The Programs Tab will give you a view into the programs your organization has listed through Bionic.
You will be able to search for or filter your listings, edit, add, & deactivate programs, set programs to Premium or Standard listings, and view program details.
It will also highlight problem areas that may degrade the quality or visibility of your programs.
Tip: See How to Fix Problems with Programs
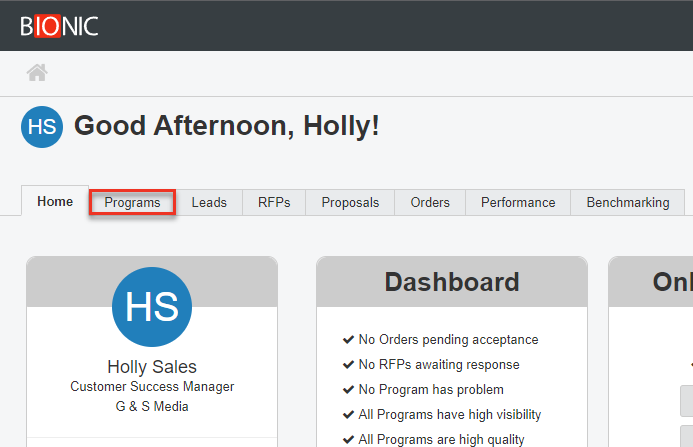
To get to Programs:
- Login to Bionic
- Click on Programs

Breakdown
Now that we are in Programs, let's break down each section:

- Name- This is the name of the program, which is typically the brand/station/publication/platform.
- Image - Displays the image, if present, that is displayed on your program. You can add, remove, and change this image by following the instructions here.
- Code - An internally defined code that represents your identification for this program
- Status - Indicate whether the program is active or inactive. When Inactive, the program will not be presented to planners.
- Level - Indicates whether program is Standard or Premium.
- Visibility - Indicates whether visibility is Private (internal only), Low (standard listing), or High (premium listing). Learn more about Visibility here.
- Quality - This is grade calculated by Bionic that indicates completeness of your program data based around what media planners have indicated they want to see. You can learn more about how to improve your Quality here.
- Contacts - Displays the primary contact listed on this program. You can learn how to manage your contacts here.
- Products - Displays the number of products listed on this program. If no products are present, it will display 'missing'. You can learn how to manage your products here.
- Freshness - Displays how long ago the program was last updated. You can edit your program and make updates to address any issues with freshness.
- Reach/month - Displays the reach per month included for this program. You can click on the value to edit it.
- Impressions/month - Displays the impressions per month included for this program. You can click on the value to edit it.
- # Placements - Counts the number of placements this program has been included in by media planners using Bionic.
- Revenue - The amount of revenue calculated across placements where it has been used. Note that this amount is lower than the actual, as some agencies do not include costs in their media plans.
- Channels - Displays the types of channels this program supports.
- Categories - Representation of the types of content you provide to your audiences.
- Last Updated - When the program was last updated.
- Last Updated By - Which user last updated this program.
- ID - Bionic generated unique ID.
Upgrade Programs to Premium
Upgrading your programs can help get you in front of media planners. You can find out more about Premium listings here.
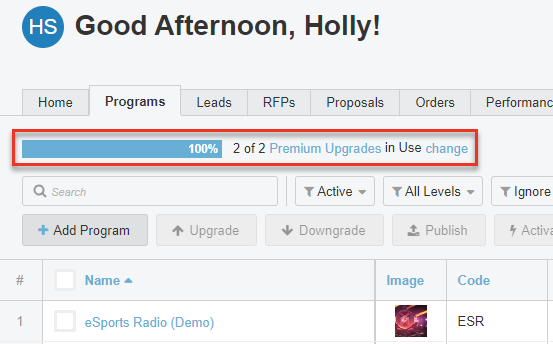
If your company has opted to participate in Premium listing, you can use the Licensing information to help you keep in check with current limits.
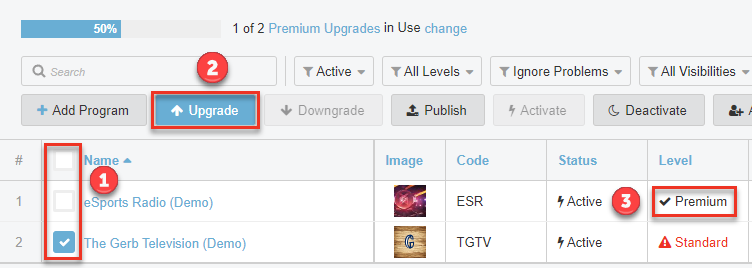
Upgrade a Program
- Place a check mark next to the Program(s) you want to upgrade. Use the checkbox at the top to select all displayed Programs.
- Press the Upgrade button at the top.
- Your Level status will change to Premium.
Important Note: If your selection exceed your Premium License count, a warning will be presented.
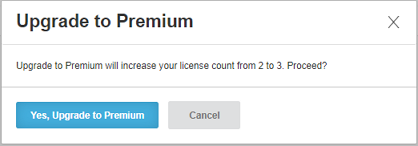
By clicking Yes, you will incur a fee for each additional Premium license as outlined in our product page.
Press Cancel if you don't want to continue.
Downgrade Programs to Standard
If you no longer want a listing Premium, you can downgrade it.
- Place a check mark next to the Program(s) you want to downgrade. Use the checkbox at the top to select all displayed Programs.
- Press the Downgrade button.
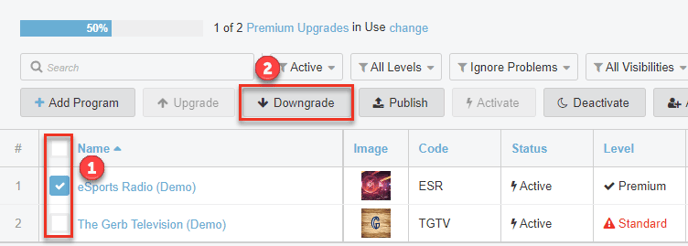
Note: Downgrading does not decrease your licenses. If you do not want to make another program premium in it's place, use the change link in the licensing to contact Bionic Customer Support.
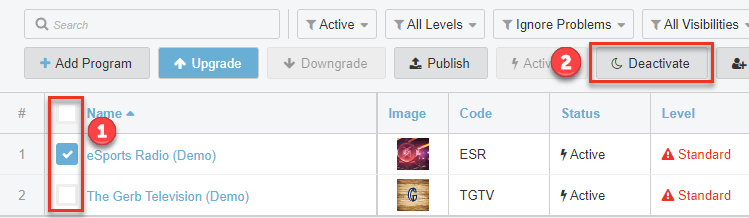
Deactivate Programs
If you see a program that is no longer available, you can deactivate it.
- Place a check mark next to the Program(s) you want to deactivate. Use the checkbox at the top to select all displayed Programs.
- Press the Deactivate button at the top.
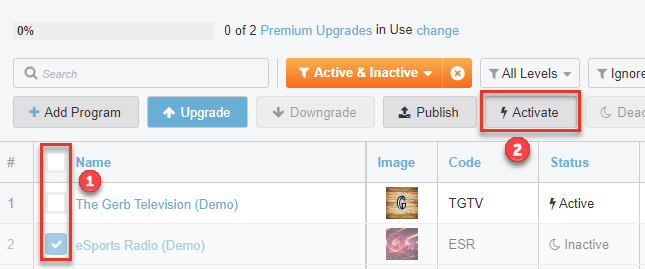
Activate Programs
Any programs previously deactivated can be reactivated.
- Place a check mark next to the Program(s) you want to activate. Use the checkbox at the top to select all displayed Programs.
- Press the Activate button at the top.
Search For Program By Name
If you have a long list of programs, you can quickly search for a program by name by entering part of the name in the search box.
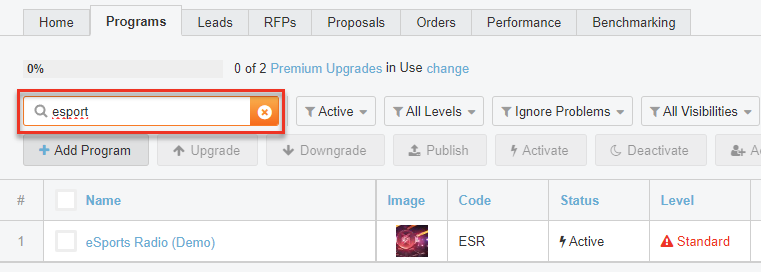
This will automatically filter the list to matching results.
Tip: If you are in broadcast, use the call letters to search.
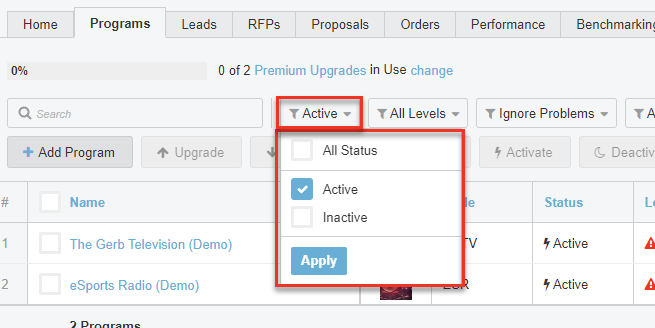
Filter Programs By Status
You may only want to see programs that are active. Or maybe you need to search for a card that was previously deactivated.
Use the Filter option to limit your view to Active, Inactive, or All Statuses.
Filter Programs By Listing Level
Use the Level Filter option to limit your view to Premium, Standard, or All Levels.
