Learn in Bionic Academy: Manage Your Advertisers - The Basics Course
Learn in Bionic Academy: Manage Your Advertisers - Intermediate Course
Advertisers will represent your clients or your company (if you are an in-house agency). They can be standalone companies, or could be set up to represent a hierarchy. Within the advertiser, you can also store additional information to share across your team.
See Manage Advertisers to understand more about Advertisers and hierarchy.
Here is how you can set up your advertisers:
- Create an Individual Advertiser
- Create Advertiser Hierarchy
- Manage Advertiser Information
- Delete Advertiser
Create an Individual Advertiser
You will need to start by creating an advertiser. If your advertiser needs hierarchy, begin with these steps first, then follow the steps in Create Advertiser Hierarchy.
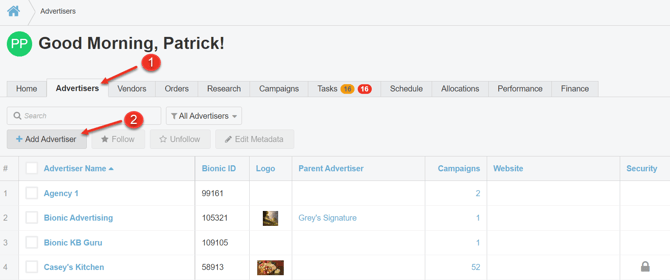
- Click on the Advertisers tab.
- Press the Add Advertiser button.
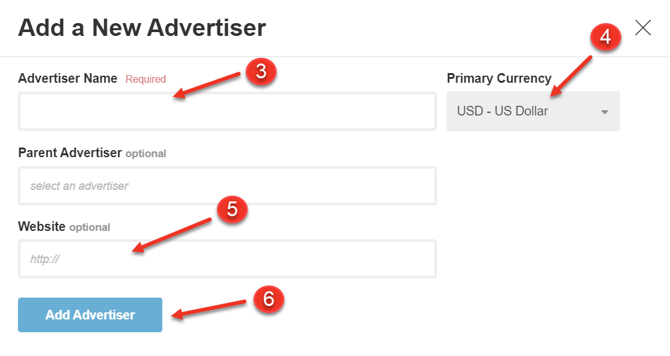
- Enter the Advertiser's name.
- Set the Primary Currency for this Advertiser.
- Enter a website (optional).
- Click Add Advertiser.
Create Advertiser Hierarchy
Once you have set up an initial advertiser, you can build out hierarchy as needed.
- Click on the Advertisers tab.
- Press the Add Advertiser button.
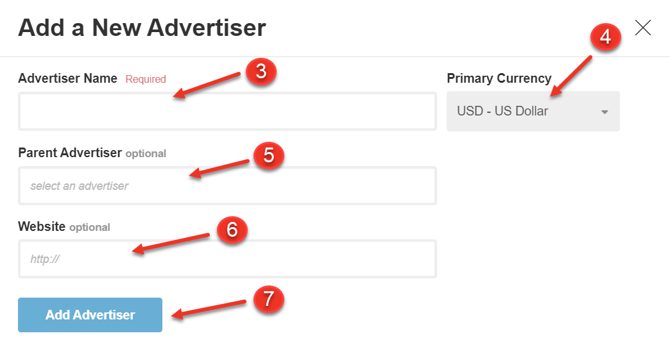
- Enter the Advertiser's name.
- Set the Primary Currency for this Advertiser.
- Select the Parent Advertiser (that Advertiser must already be set up).
- Enter a website (optional).
- Click Add Advertiser.
NOTE: If you have multiple levels of hierarchy, the "Parent Advertiser" will always be the Advertiser that the current Advertiser lives under.
Manage Advertiser Information
Once your advertiser is created, you can manage the information you want to store. This can assist with sharing insights across your teams.
You can manage all of your advertiser information in the Settings tab when viewing the advertiser.
The sections below will highlight general information you can include in the advertiser. Settings that are used as defaults for other functionality are linked to pages at the end of this section.
NOTE: Any information set in an advertiser will not effect other advertisers, even if they are part of the same hierarchy EXCEPT for security settings.
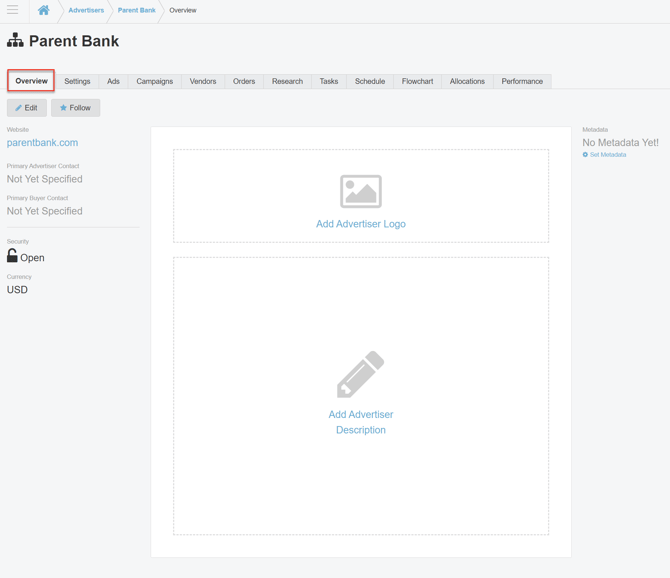
Overview Tab
The Overview Tab of the advertiser will provide insights based on information provided in the Settings of that advertiser.
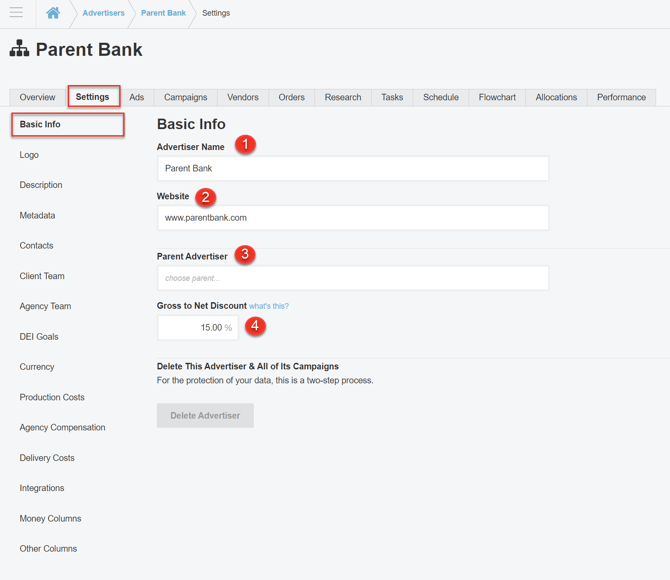
Manage Basic Info
The Basic Info section under the Settings Tab stores the basic information about the advertiser that you initially established when you set up the advertiser. You can easily change this information as needed.
- Change Advertiser Name.
- Change website.
- Change the Parent Advertiser (this will change the hierarchy).
- Change Gross to Net Discount
Changes will automatically save.
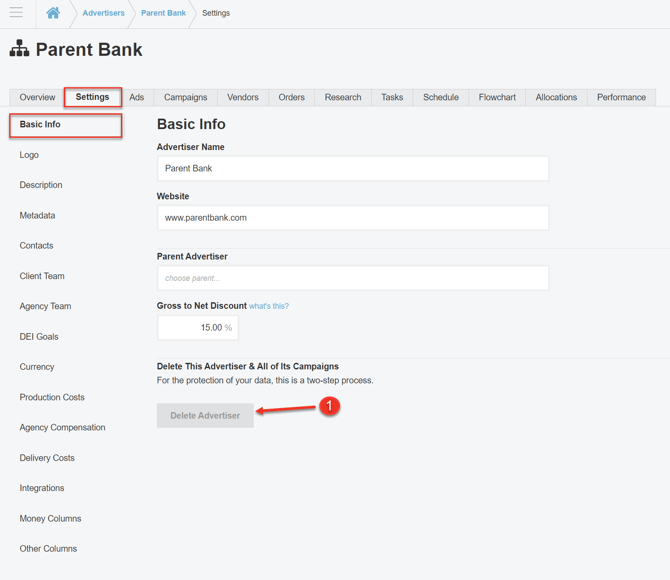
Delete Advertiser
At any time you can delete an advertiser. When you delete an advertiser, it will also delete any campaigns that are assigned to this advertiser.
You can move campaigns to another advertiser before deleting an advertiser if you do not want to delete the campaigns.
- In the Basic Info section, press the Delete Advertiser button.
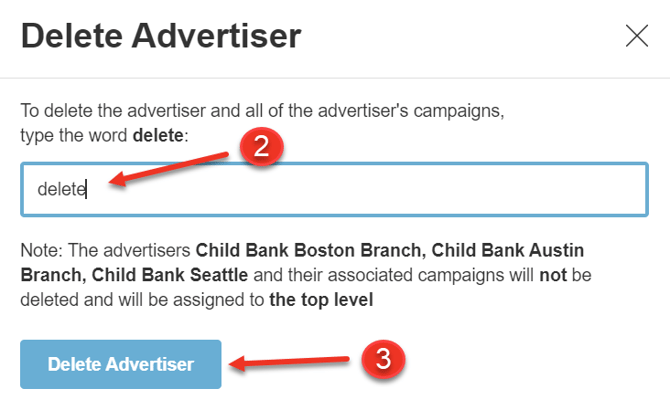
- To confirm the deletion, type delete in the box.
- Press Delete Advertiser to complete the deletion process.
Add or Remove a Logo
The Logo section of the settings will provide an area where you can upload the advertiser's logo. The logo will be used in the PowerPoint export file and throughout Bionic when working in the interface.
Each advertiser will need it's own logo, even when part of a hierarchy.
To upload the advertiser's logo:
- Press the Choose File button.
- Select the file.
- Press Open.
![]()
![]()
To remove a logo:
- Press the Remove Image button.
![]()
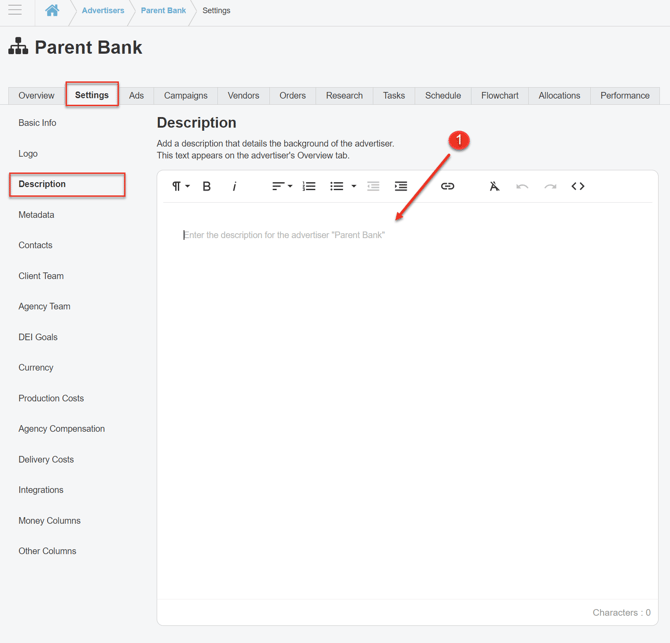
Include a Description
The description section can be used to convey information about this advertiser - who they are, what you do for them, and their overall goals. Specific campaign information can be shared in the individual campaigns.
- Enter or paste content that you want to share in the Description section of the advertiser.
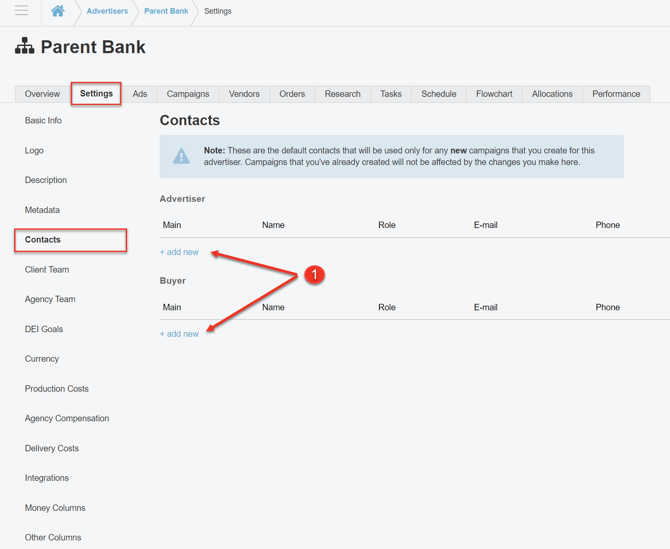
Identify Contacts
Contacts can be used to help track the advertiser contacts as well as your internal contacts. These will carry into the campaign settings automatically.
To set contacts:
- Go to the Advertiser or Buyer section, as appropriate and press the + add new link.
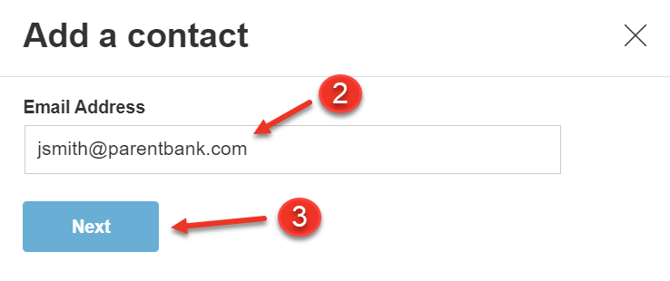
- Enter the email address of the contact.
- Press Next.
- If this is a known contact, the contact will be presented:
- Select the Role for the contact.
- Select the Star icon to mark this contact as a Main Contact (optional)
- Press Confirm.
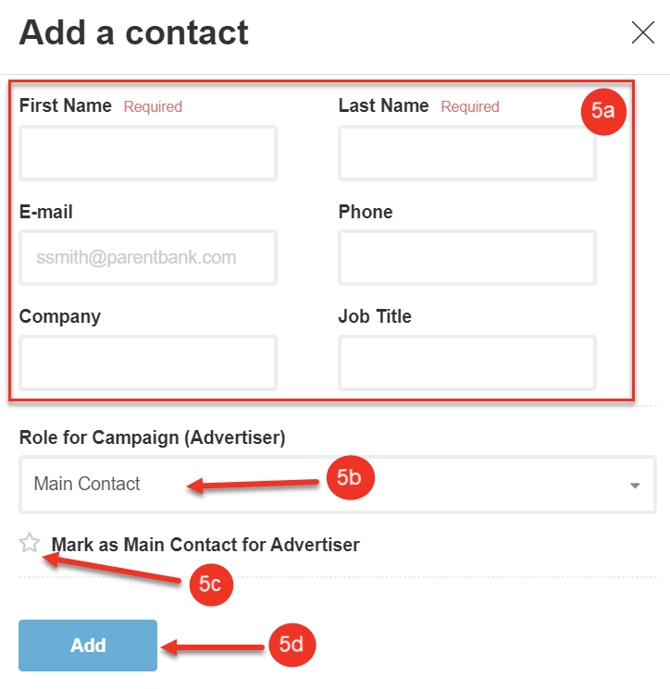
- If this is not a known contact:
-
- Enter the contact information for this person.
- Select the Role for the contact.
- Select the Star icon to mark this contact as a Main Contact (optional).
- Press Add.

Next Steps
- Set Advertiser Metadata
- Secure Advertiser Access (Agency Team)
- Establish Advertiser DEI Goals
- Set Advertiser Default Currency
- Set Advertiser Default Production Costs
- Set Advertiser Default Agency Compensation
- Set Advertiser Default Delivery Costs
- Set Advertiser Default Integrations
- Set Advertiser Default Custom Columns
- Establish Advertiser Client Team